

Most people who quit Facebook ads don’t quit because their targeting was bad or their budget was too small. They quit because the interface looks like a cockpit, they click around for twenty minutes, get confused, spend forty dollars on nothing, and decide the whole thing is a scam. It’s not a scam. It’s just a tool nobody hands you an instruction manual for.
Here’s the thing though. Facebook, or Meta if you want to be technical about it, still puts you in front of an enormous number of people every single day, and a huge chunk of them are exactly the kind of person who’d buy what you’re selling if they just knew you existed. That’s the whole pitch. You’re not trying to convince strangers to want something they don’t want. You’re trying to get in front of the right stranger at the right moment, and ads are still the fastest way to do that, because organic reach on a business Page these days is basically a rumor.
This isn’t a “10 tips to grow your ROAS” listicle. Open Ads Manager in another tab if you want, because we’re going to walk through this the way you’d actually do it, click by click where it matters. Account setup, campaign structure, picking the right objective, setting a budget that won’t embarrass you, building the actual ad, and what to do, and very much not do, once it goes live. By the end you should be able to launch a real campaign, not just nod along and close the tab.
You don’t need a big budget to run good Facebook ads. You need a clear objective, the right audience, and honestly, the patience to leave your ad alone for a few days once it’s live. That last part trips up more beginners than anything else on this list.
What You Need Before You Open Ads Manager
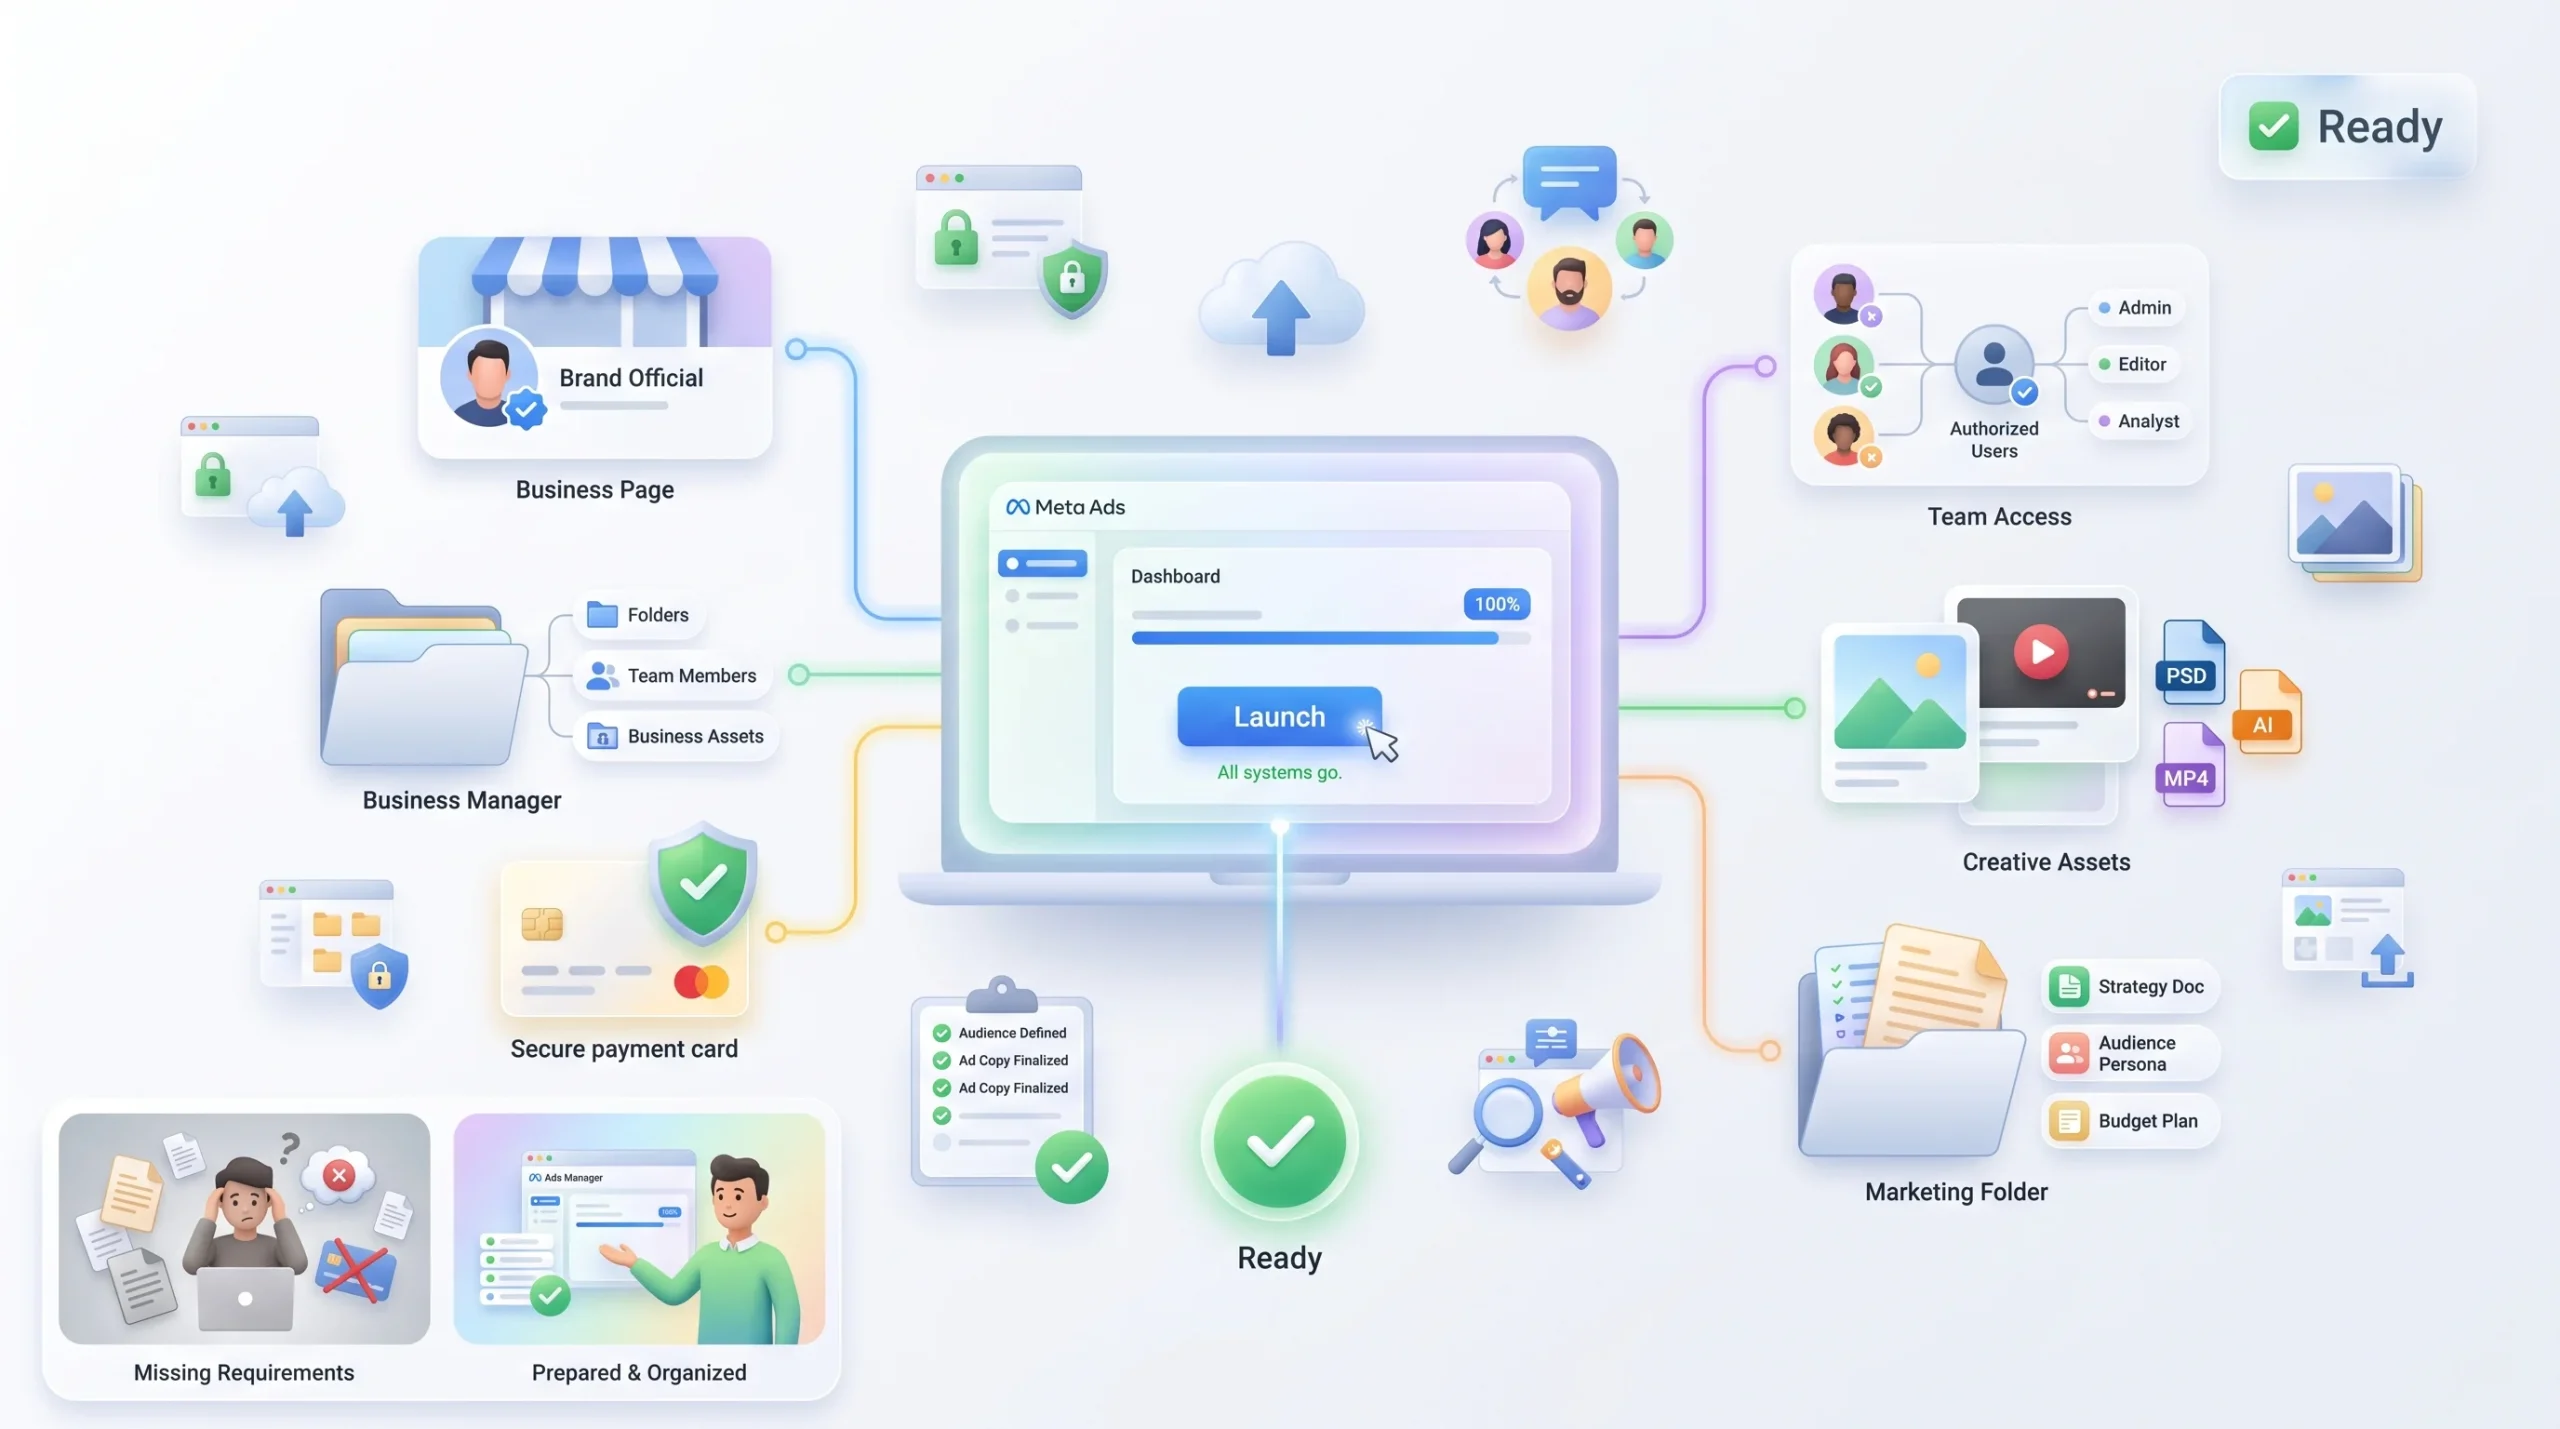
Before touching a single setting, get a few things sorted. Walking into Ads Manager without these ready is how a fifteen-minute setup turns into a two-hour scavenger hunt.
First, you need a Facebook Business Page. Not a personal profile, an actual Page. Facebook doesn’t let you run ads from a personal account, full stop, and there’s a good reason for that. Ads are a business function, and Facebook wants a layer of separation between “my cousin posting vacation photos” and “a company spending money to reach strangers.” If you don’t have a Page yet, that’s step zero, before any of this.
Next up is a Meta Business Suite account, sometimes called Business Manager. Technically, if you’re running ads for your own single Page and you’re not working with a team or a client, you can skip this and run ads directly through the Page. But honestly, setting it up early saves headaches later, especially the moment you add a second Page, bring on a freelancer, or start managing ads for someone else. It centralizes your billing, your roles, and every ad account you touch in one place.
If this is a client’s Page, or a business that isn’t yours, you need to be added as an Admin, Editor, or Advertiser before you can do anything. Don’t find this out during a kickoff call. Ask for access first.
You also need a verified payment method on file. No card, no ads. Facebook won’t even let the campaign go live without one attached to the account.
And finally, have your creative ready. At minimum, one clean image or a short video that actually represents what you’re advertising. Scrambling to find a decent photo mid-setup is a bad time, and it usually ends with someone grabbing a blurry phone photo because they’re tired of clicking around.
| Requirement | Why You Need It | Can You Skip It? |
|---|---|---|
| Facebook Business Page | Ads can only run through a Page, not a personal profile | No |
| Meta Business Suite account | Centralizes billing, roles, and multiple ad accounts | Optional for solo beginners with one Page |
| Verified payment method | Meta won’t deliver ads without one on file | No |
| Admin/Advertiser role | Required if you’re managing someone else’s Page | Only if it’s your own Page |
| Creative assets (image/video) | You can’t launch an ad without at least one piece of creative | No |
Tip: If this is a client account, get added as an Advertiser or Admin before the kickoff call, not during it. Nothing kills momentum like sitting on a call waiting for someone to figure out how to add you to Business Manager.
Understanding Facebook’s Account Structure
This is the part most guides rush through, and it’s exactly why so many beginners get lost the second they hit ad set level. Get this structure into your head first, and everything after this makes a lot more sense.
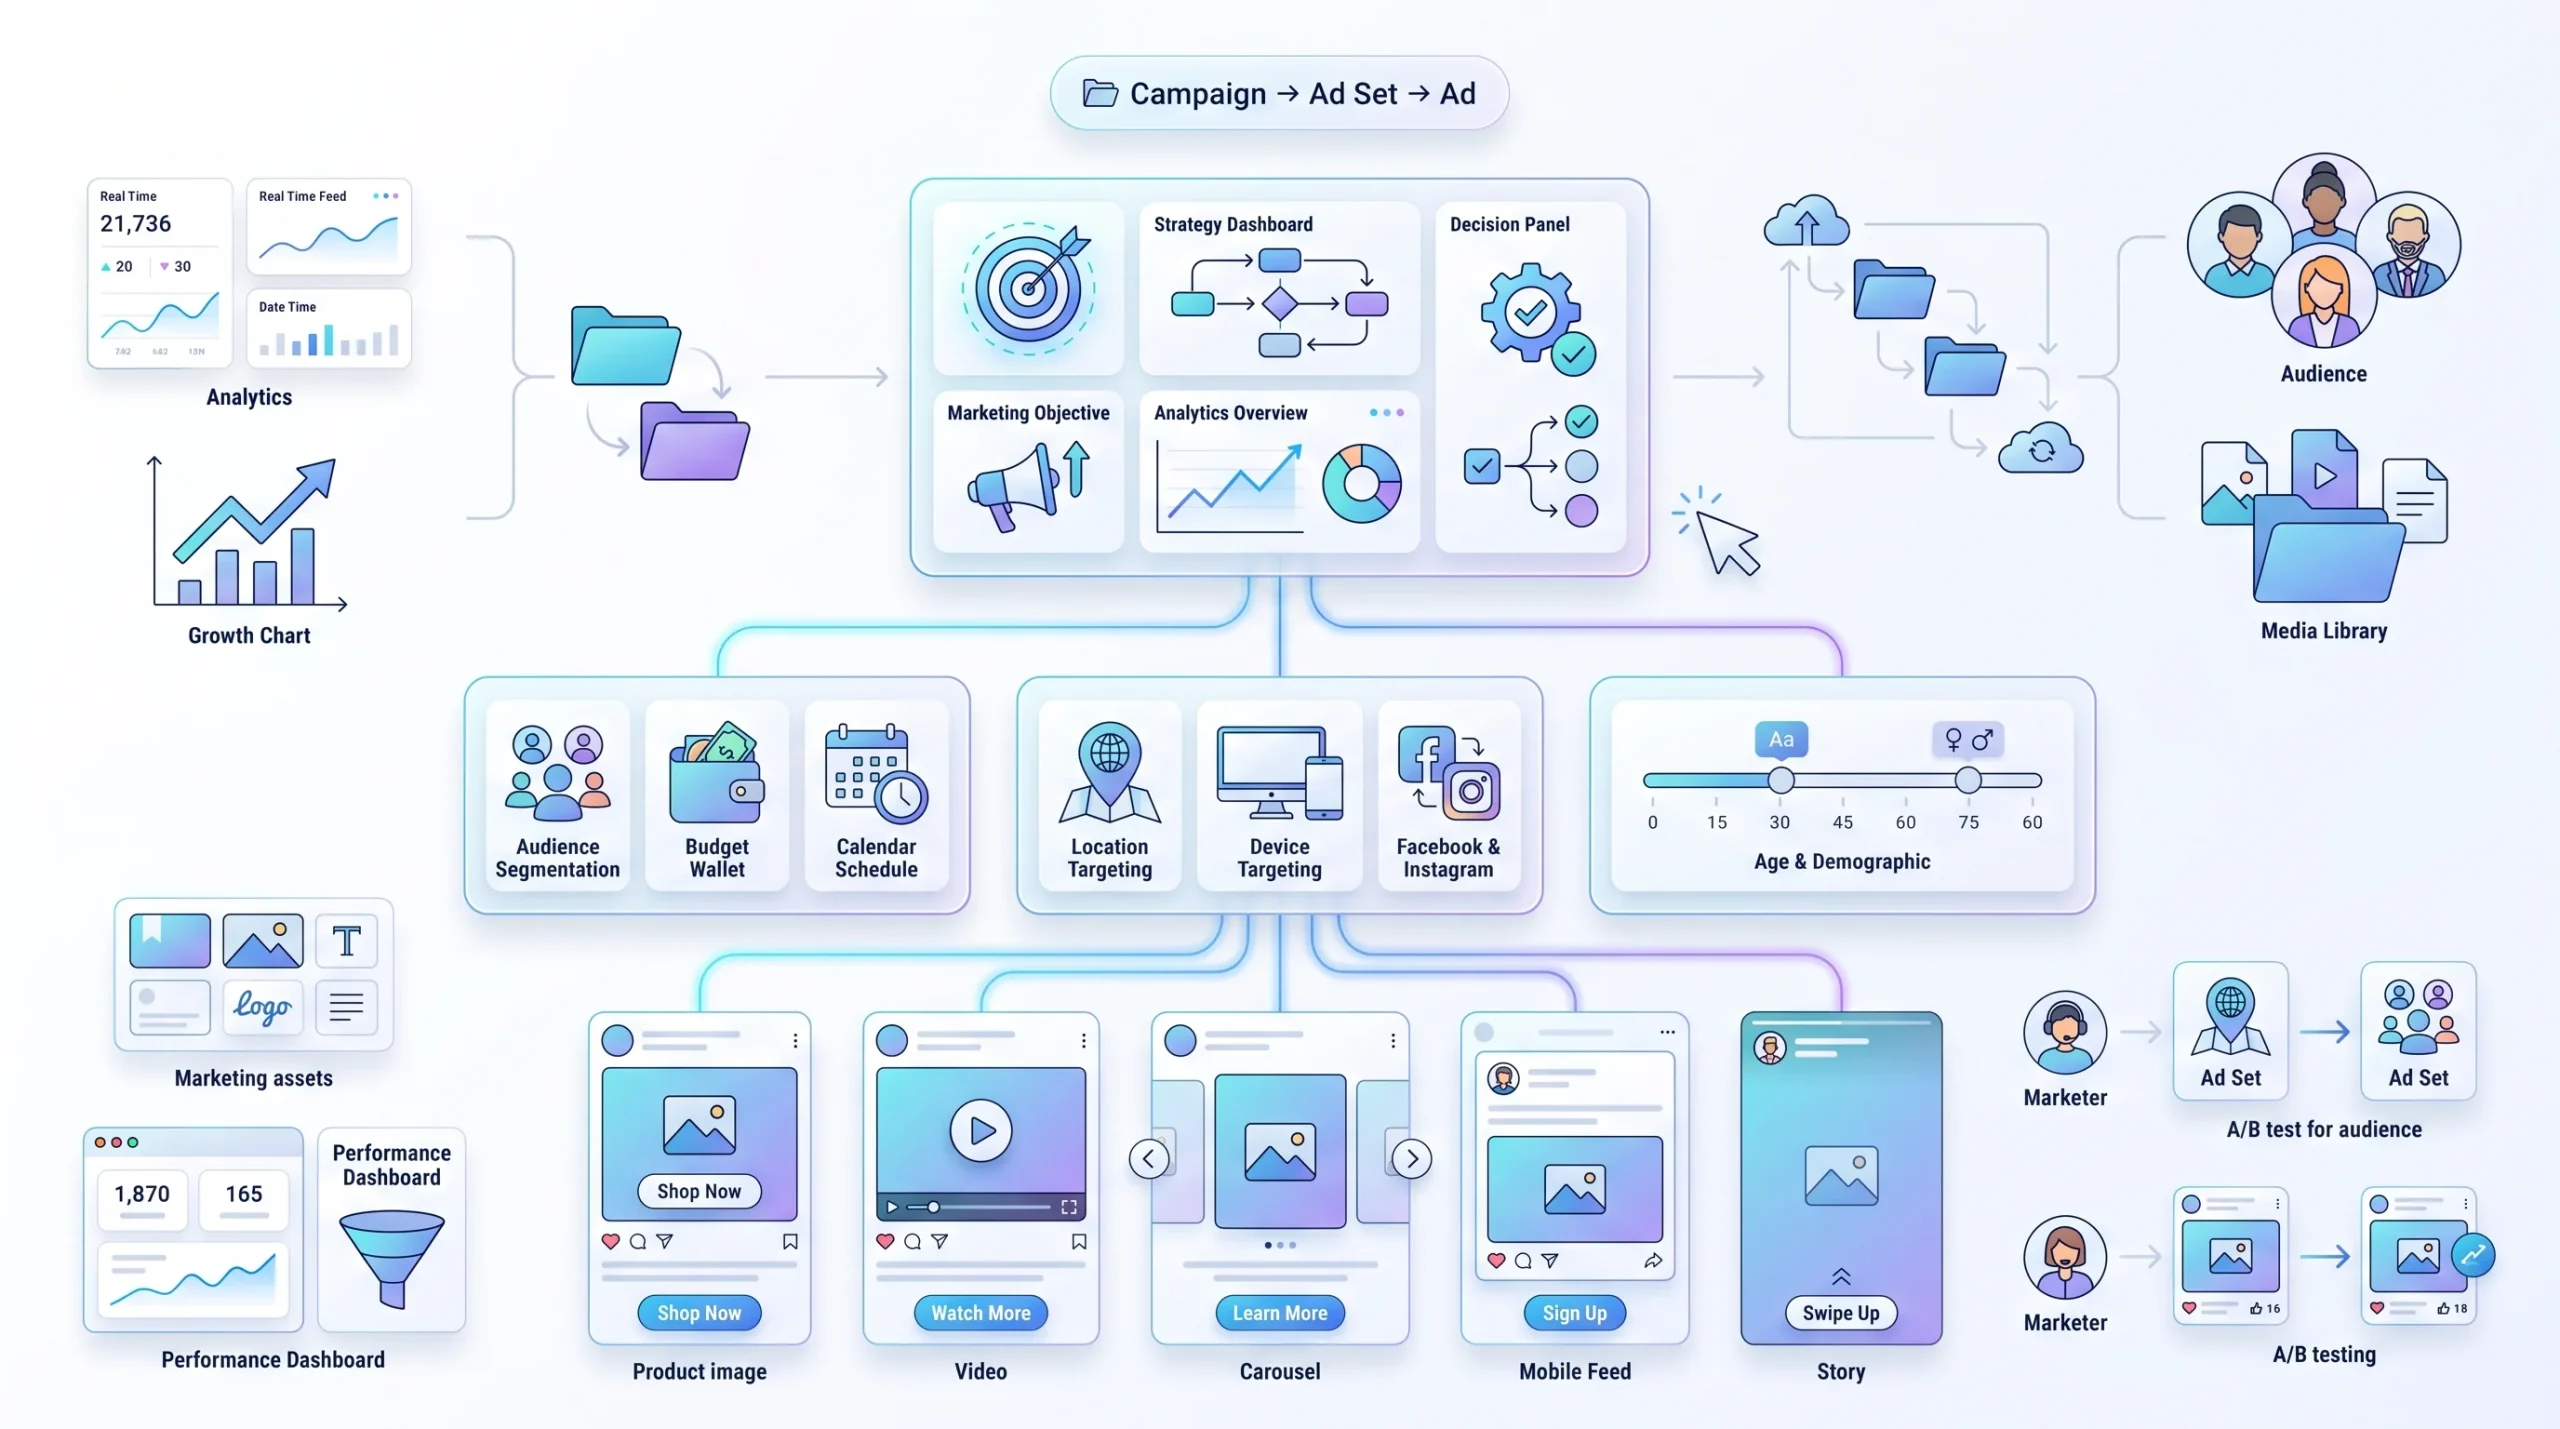
Facebook ads run on a three-level hierarchy. Campaign, then Ad Set, then Ad. Think of it like a filing cabinet. The campaign is the drawer, the ad set is the folder inside that drawer, and the ad is the actual document sitting in the folder.
At the campaign level, you set your objective. That’s the “what am I actually trying to achieve here” decision, and it sits above everything else.
At the ad set level, you decide who sees the ad, how much you’re spending, when it runs, and where it shows up. This is the “who am I trying to reach, and with how much money” layer.
At the ad level, you build the actual thing people see. The image or video, the headline, the copy, the button they click.
Why does Facebook split things up this way instead of letting you just build one big ad? Because it lets you test one variable at a time without tearing the whole thing down. Want to try a new audience without touching your creative? Duplicate the ad set. Want to test a new headline without rebuilding your targeting? Duplicate the ad. That’s the entire point of the structure, and once it clicks, campaign building stops feeling like guesswork.
| Level | What You Set Here | Example |
|---|---|---|
| Campaign | Objective (what result you want) | “Get more website purchases” |
| Ad Set | Audience, budget, schedule, placements | Women 25 to 45, US, $20/day, Instagram + Facebook |
| Ad | Creative, copy, headline, CTA button | Product image + “Shop the summer sale” |
Get the structure right once, and every campaign after this gets easier. Get it wrong, and you’ll be rebuilding from scratch every time you want to test something new.
Choosing the Right Campaign Objective
This is where a lot of beginners quietly sabotage themselves before the campaign even launches. They pick the objective that sounds impressive instead of the one that actually matches what they need.
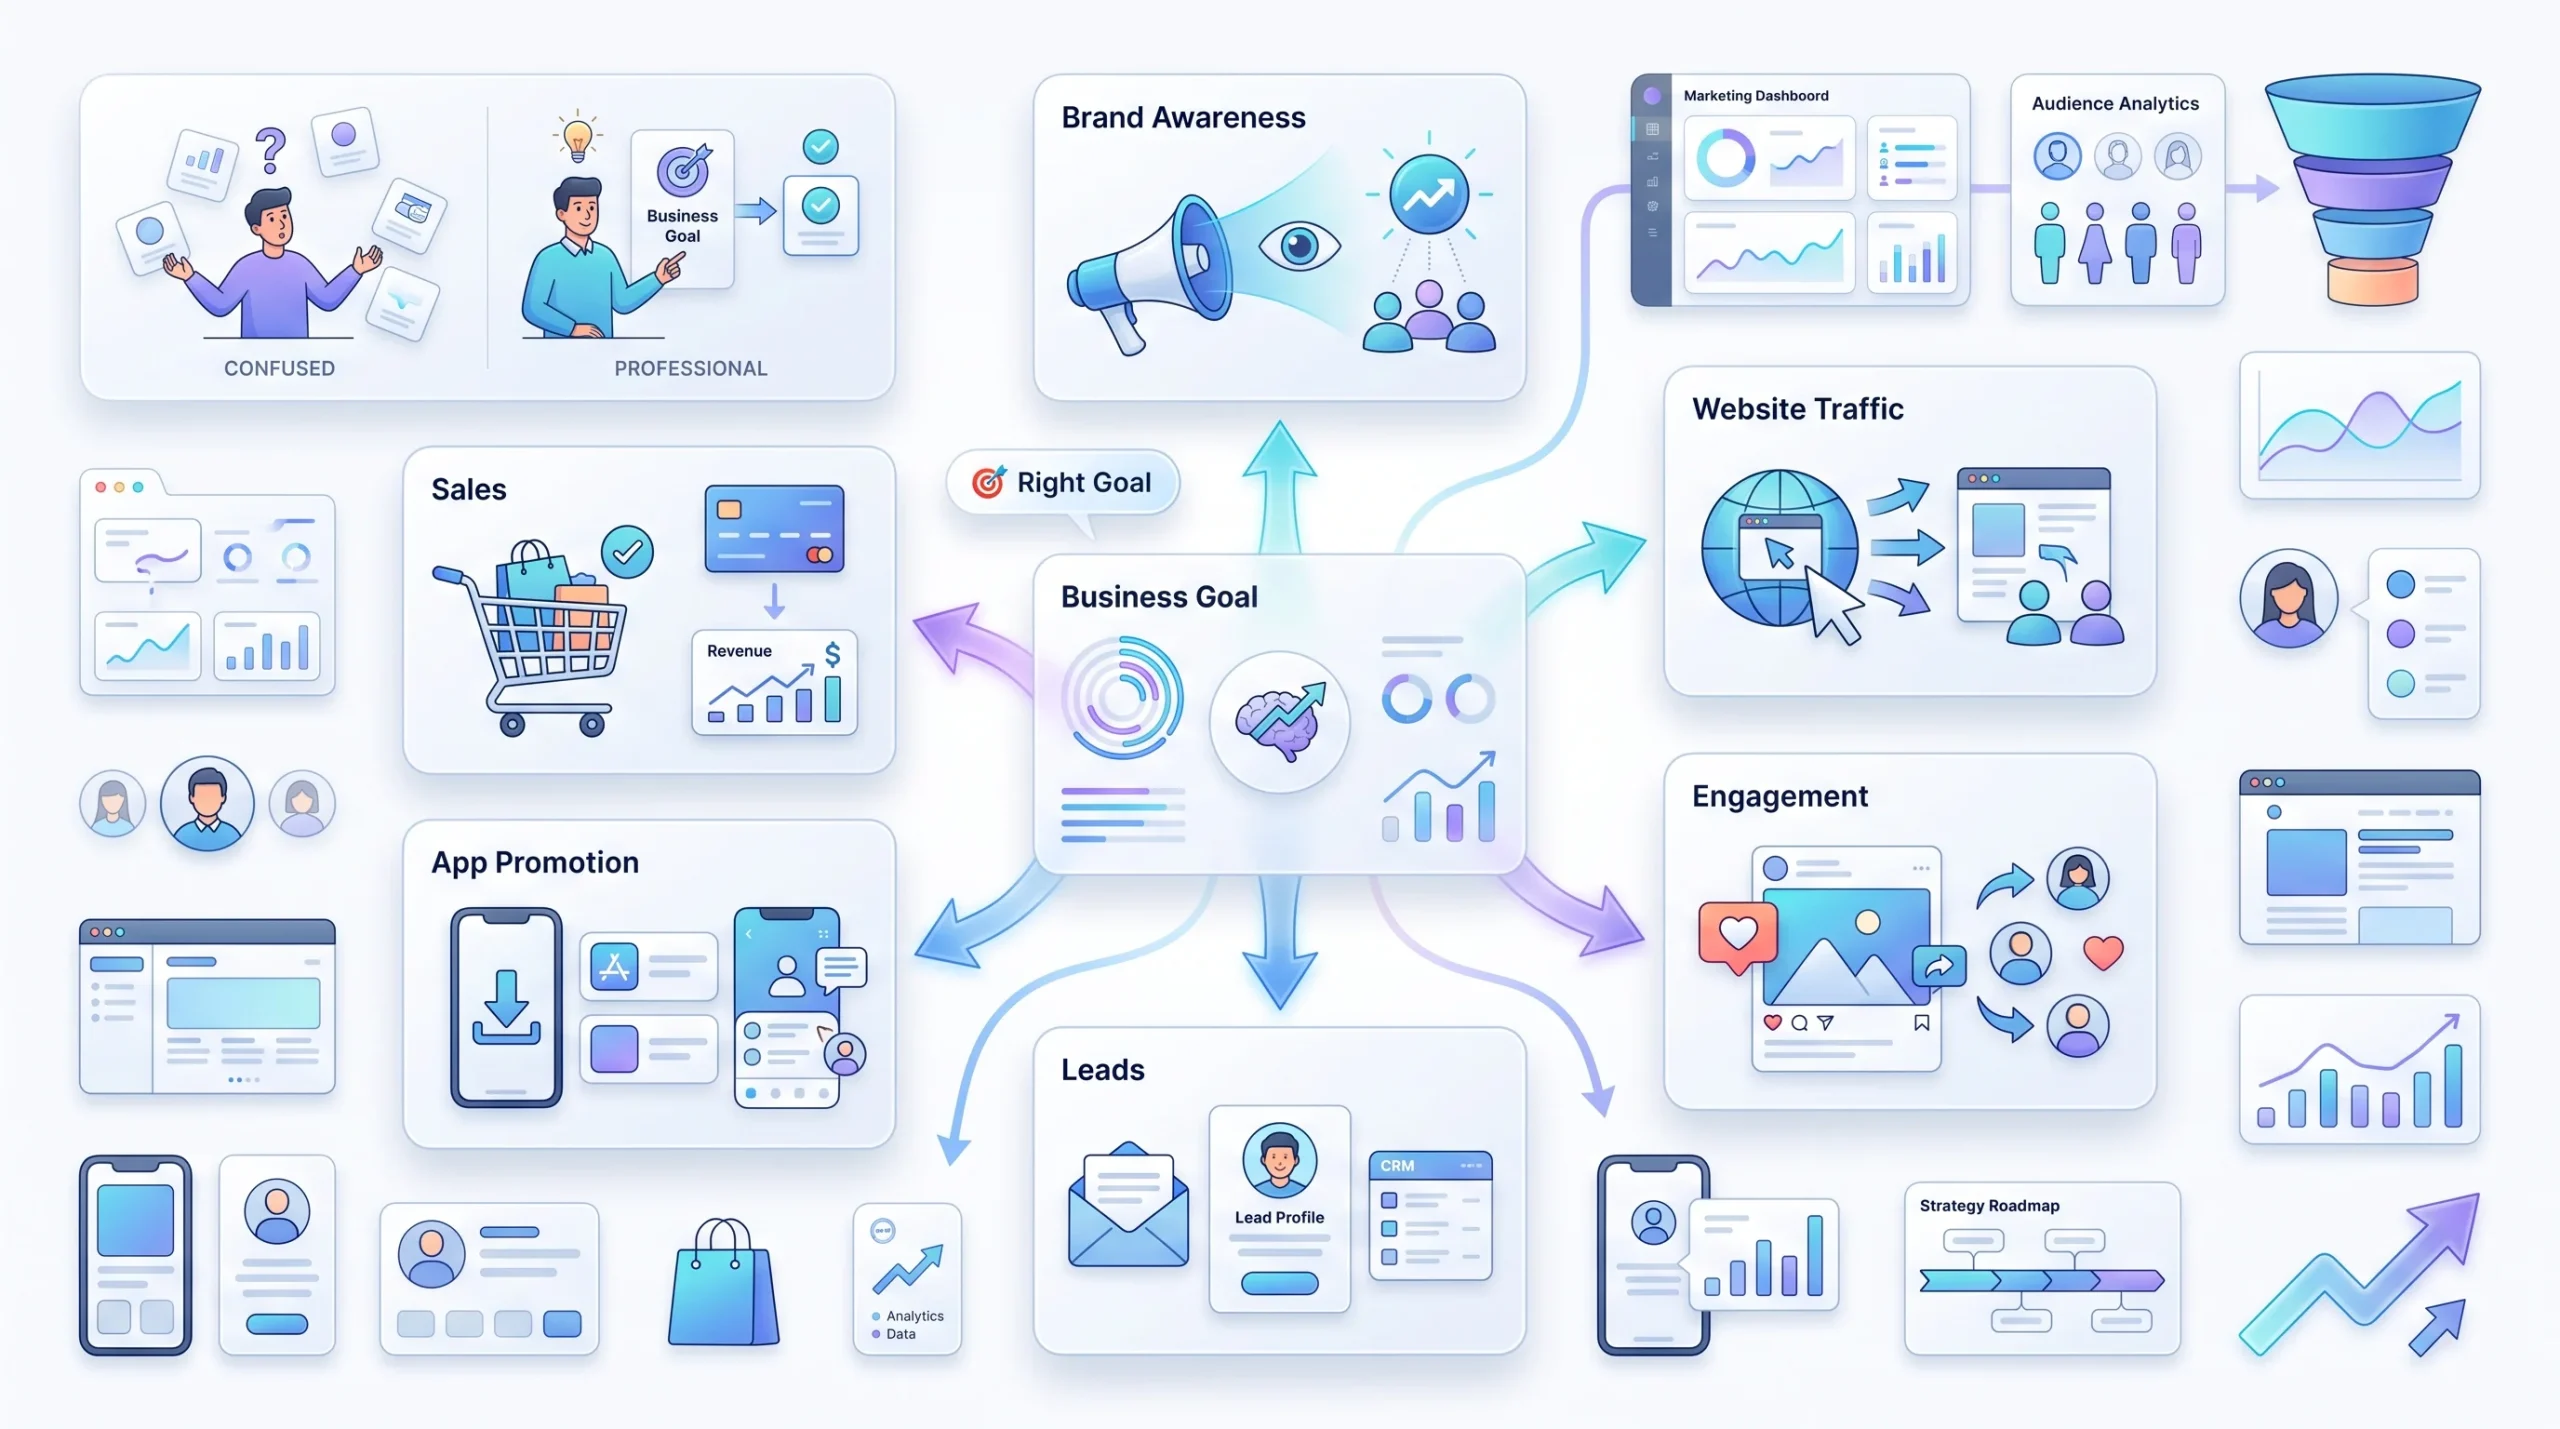
Meta runs on outcome-based objectives now. Awareness, Traffic, Engagement, Leads, App Promotion, and Sales. If you used the platform years ago and remember a much longer list of objectives, yeah, that got simplified. Fewer options, but each one maps more directly to a real business result instead of a vague metric.
Here’s the rule that actually matters: pick the objective tied to the outcome your business needs, not the one that sounds nice on a report. Engagement campaigns rack up likes and comments, and sure, that feels good to look at. But if your goal is sales and you optimize for engagement, you’re going to get a lot of people liking your post and zero people buying anything. Facebook delivers exactly what you tell it to optimize for. Tell it the wrong thing, and it’ll do that wrong thing very efficiently.
One more thing worth knowing before you pick: some objectives need tracking set up first. The Sales objective leans on the Meta Pixel and Conversions API to know when someone actually buys something. Awareness, Engagement, and Leads don’t require that setup to get started, which makes them a more realistic starting point if your website tracking isn’t live yet.
| Your Goal | Recommended Objective | Needs Pixel? |
|---|---|---|
| Get people to know your brand exists | Awareness | No |
| Drive visits to your website | Traffic | No |
| Get likes, comments, shares on a post | Engagement | No |
| Collect emails/leads | Leads | Recommended |
| Get app installs | App Promotion | No |
| Drive purchases on your website | Sales | Yes |
If there’s no pixel installed yet, don’t force the Sales objective just because it sounds like the “real” goal. Start with Traffic or Engagement to build up some signal on your Page, and move to Sales once your tracking is actually live. Forcing Sales without tracking is like trying to navigate with a GPS that isn’t picking up satellites. It’ll still run, it just won’t know where anything is.
Setting Up Your Ad Account and Business Settings
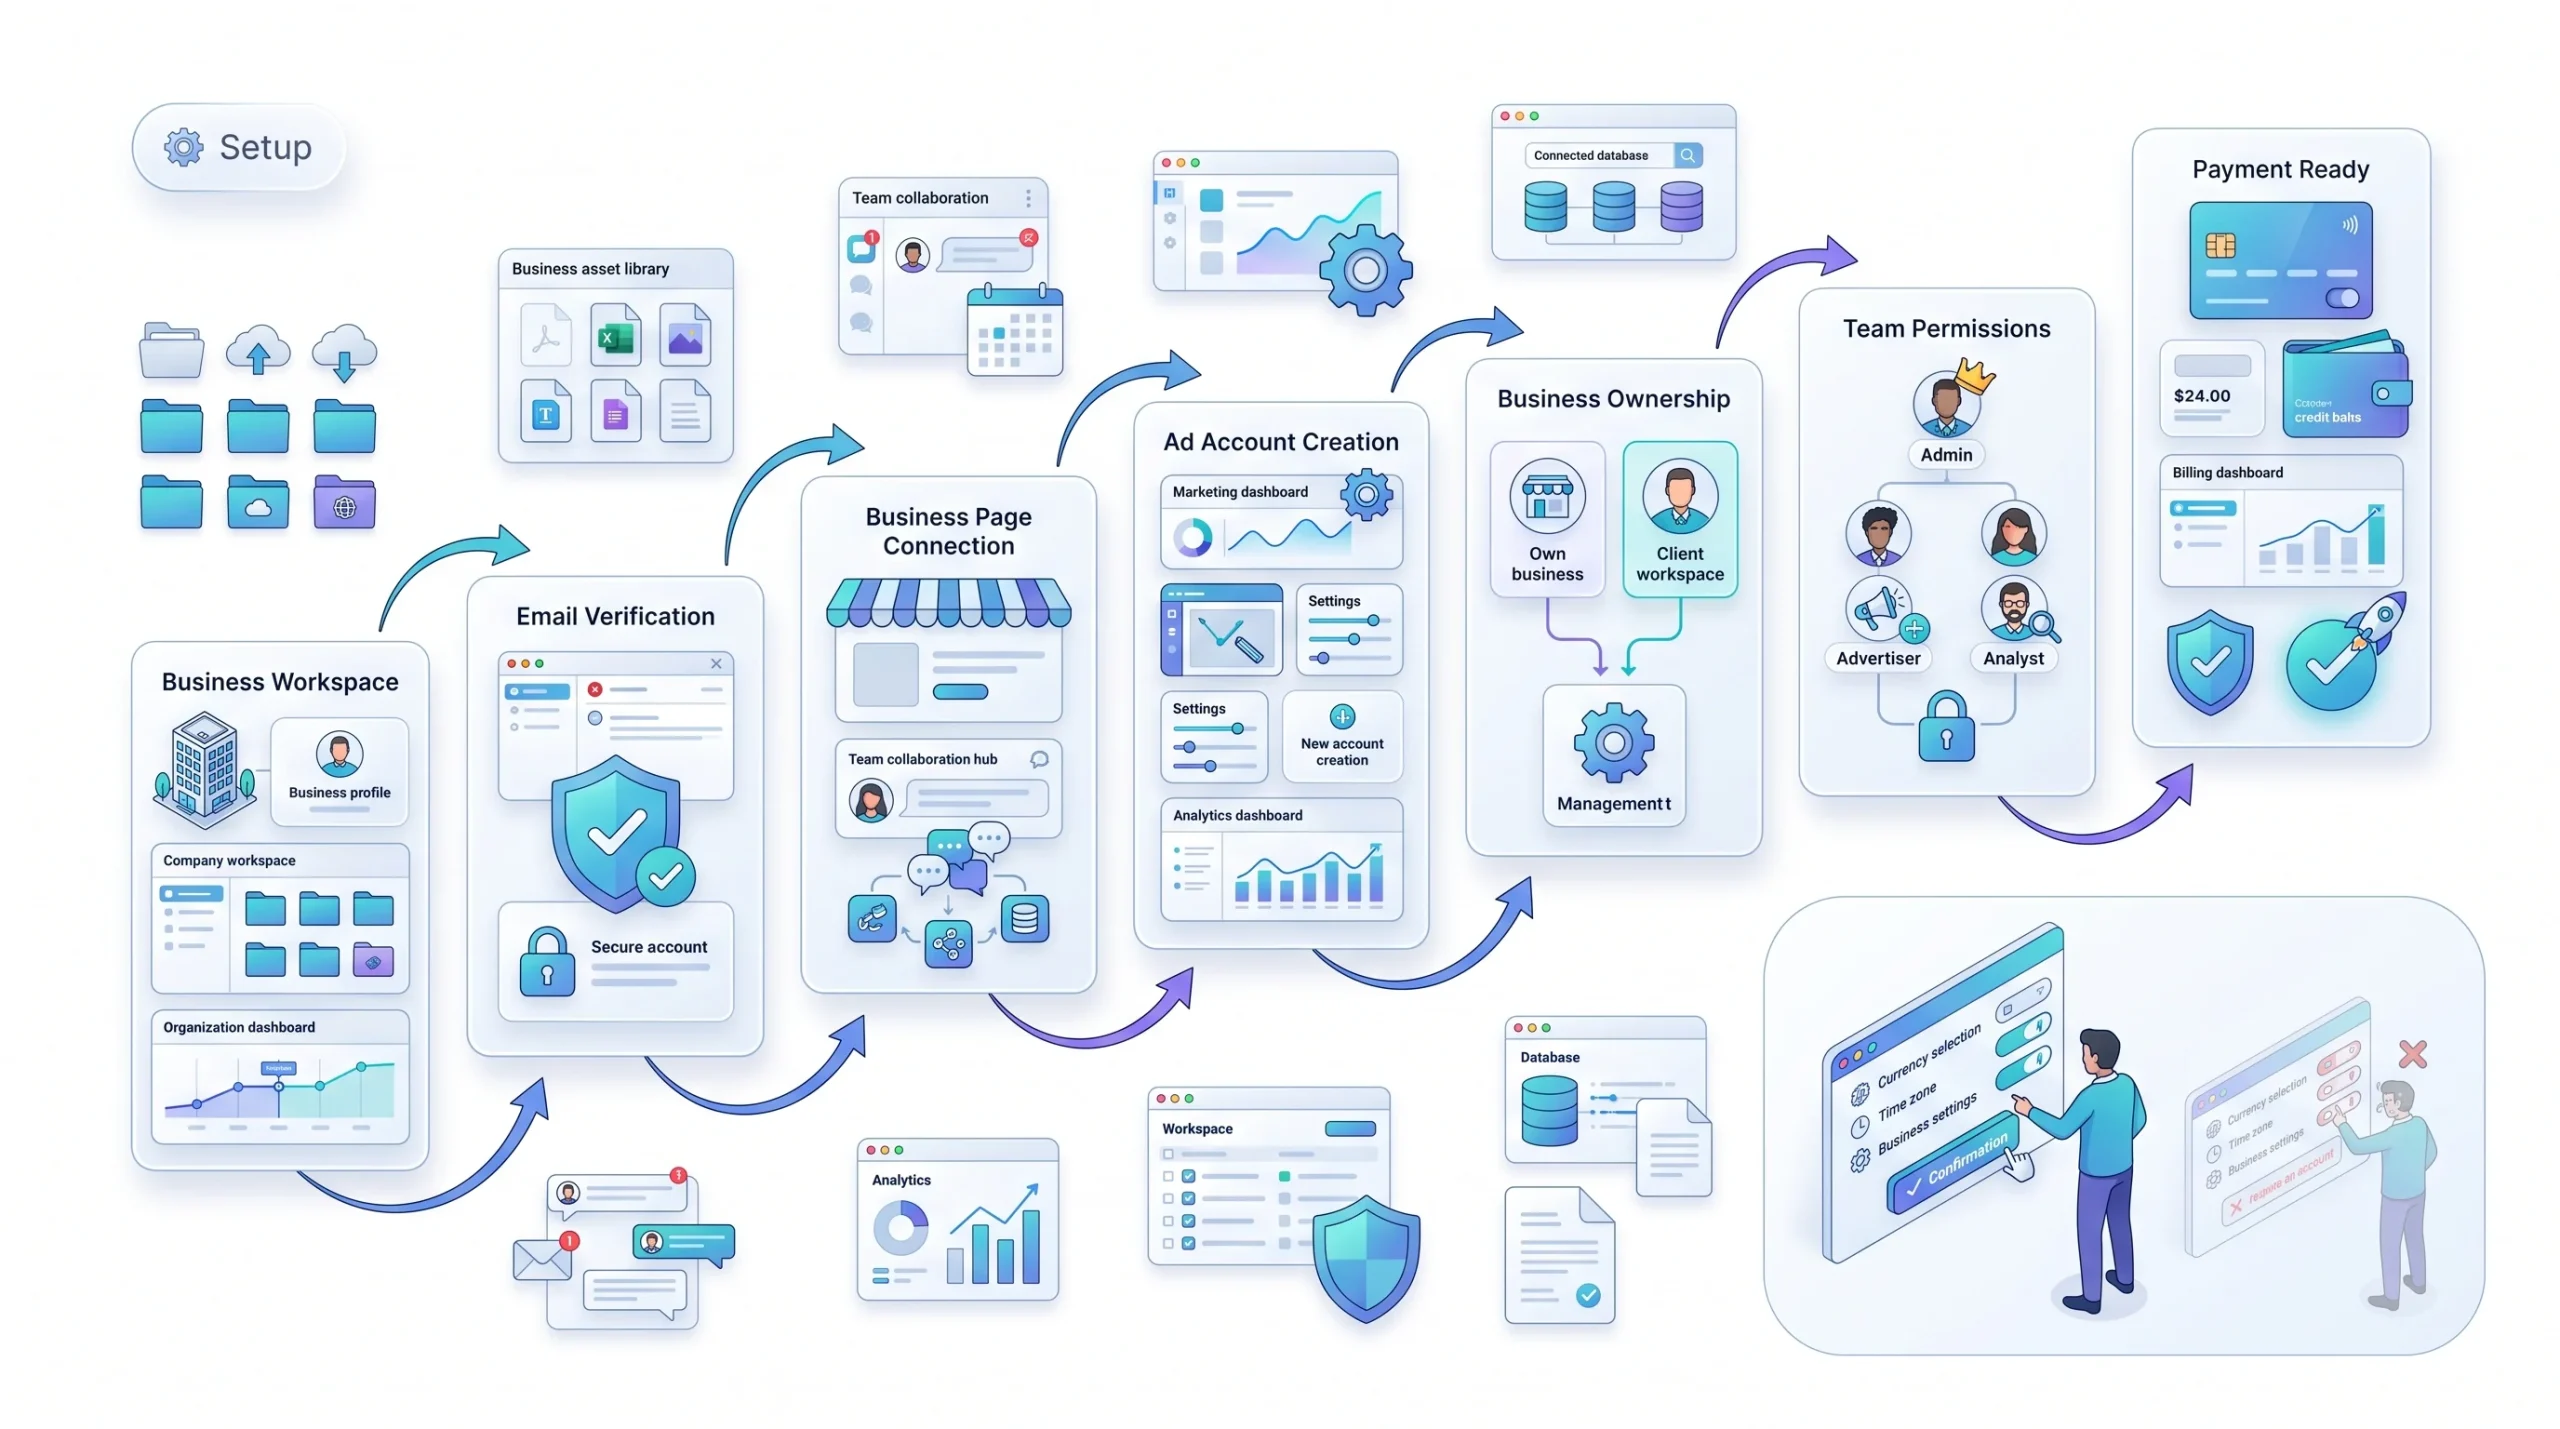
Alright, time to actually click things. This part is mechanical, but a couple of the decisions here lock in permanently, so pay attention before you breeze through. Here’s the exact sequence.
Step 1: Go to business.facebook.com and create a Business Manager account. Click “Create Account.” You’ll be asked for your business name, your name, and a business email address. Use an email you actually check, since account confirmations and ad approval notices land there.
Step 2: Confirm your email. Facebook sends a verification link. Click it. Until you do, some settings stay locked.
Step 3: Add your Business Page. Inside Business Suite, go to Business Settings, then Accounts, then Pages. If the Page is already yours, connect it in a couple of clicks. If it belongs to a client or a partner, you’ll need them to add you first as a Page Admin, Editor, or Advertiser before this step will even show the Page as an option.
Step 4: Create your ad account. Still inside Business Settings, go to Accounts, then Ad Accounts, then click “Add,” then “Create a New Ad Account.” You’ll be asked for three things: an ad account name, a time zone, and a currency.
Stop here for a second. Time zone and currency cannot be changed later. Not “hard to change.” Cannot be changed. If you pick the wrong currency, your only fix is creating an entirely new ad account from scratch. So slow down on this one screen specifically and get it right before clicking Next.
Step 5: Choose who the ad account is for. Facebook will ask whether this account is for your own business or for managing ads on behalf of another business or client. Pick accordingly.
Step 6: Add people and permissions. Select your name and assign yourself the right role. Admin gets full control over billing and settings. Advertiser can build and manage ads but can’t touch billing or account-level settings. Analyst can view performance without changing anything. Pick the one that actually matches what you’re there to do, not just the highest one available.
Step 7: Add a payment method. Go to Billing inside Business Settings and attach a card. You don’t technically have to do this in the same sitting, but you’ll need it before anything launches, so get it done now while you’re already in the settings and save yourself a second trip.
Watch out: time zone and currency lock in permanently the moment you confirm them. Get this wrong and you’re not editing a setting, you’re creating a whole new ad account. Worth the extra ten seconds to double check before hitting confirm.
Auction vs. Reservation: Which Buying Type to Use
Quick one here, but worth knowing so you’re not confused when you see the option.
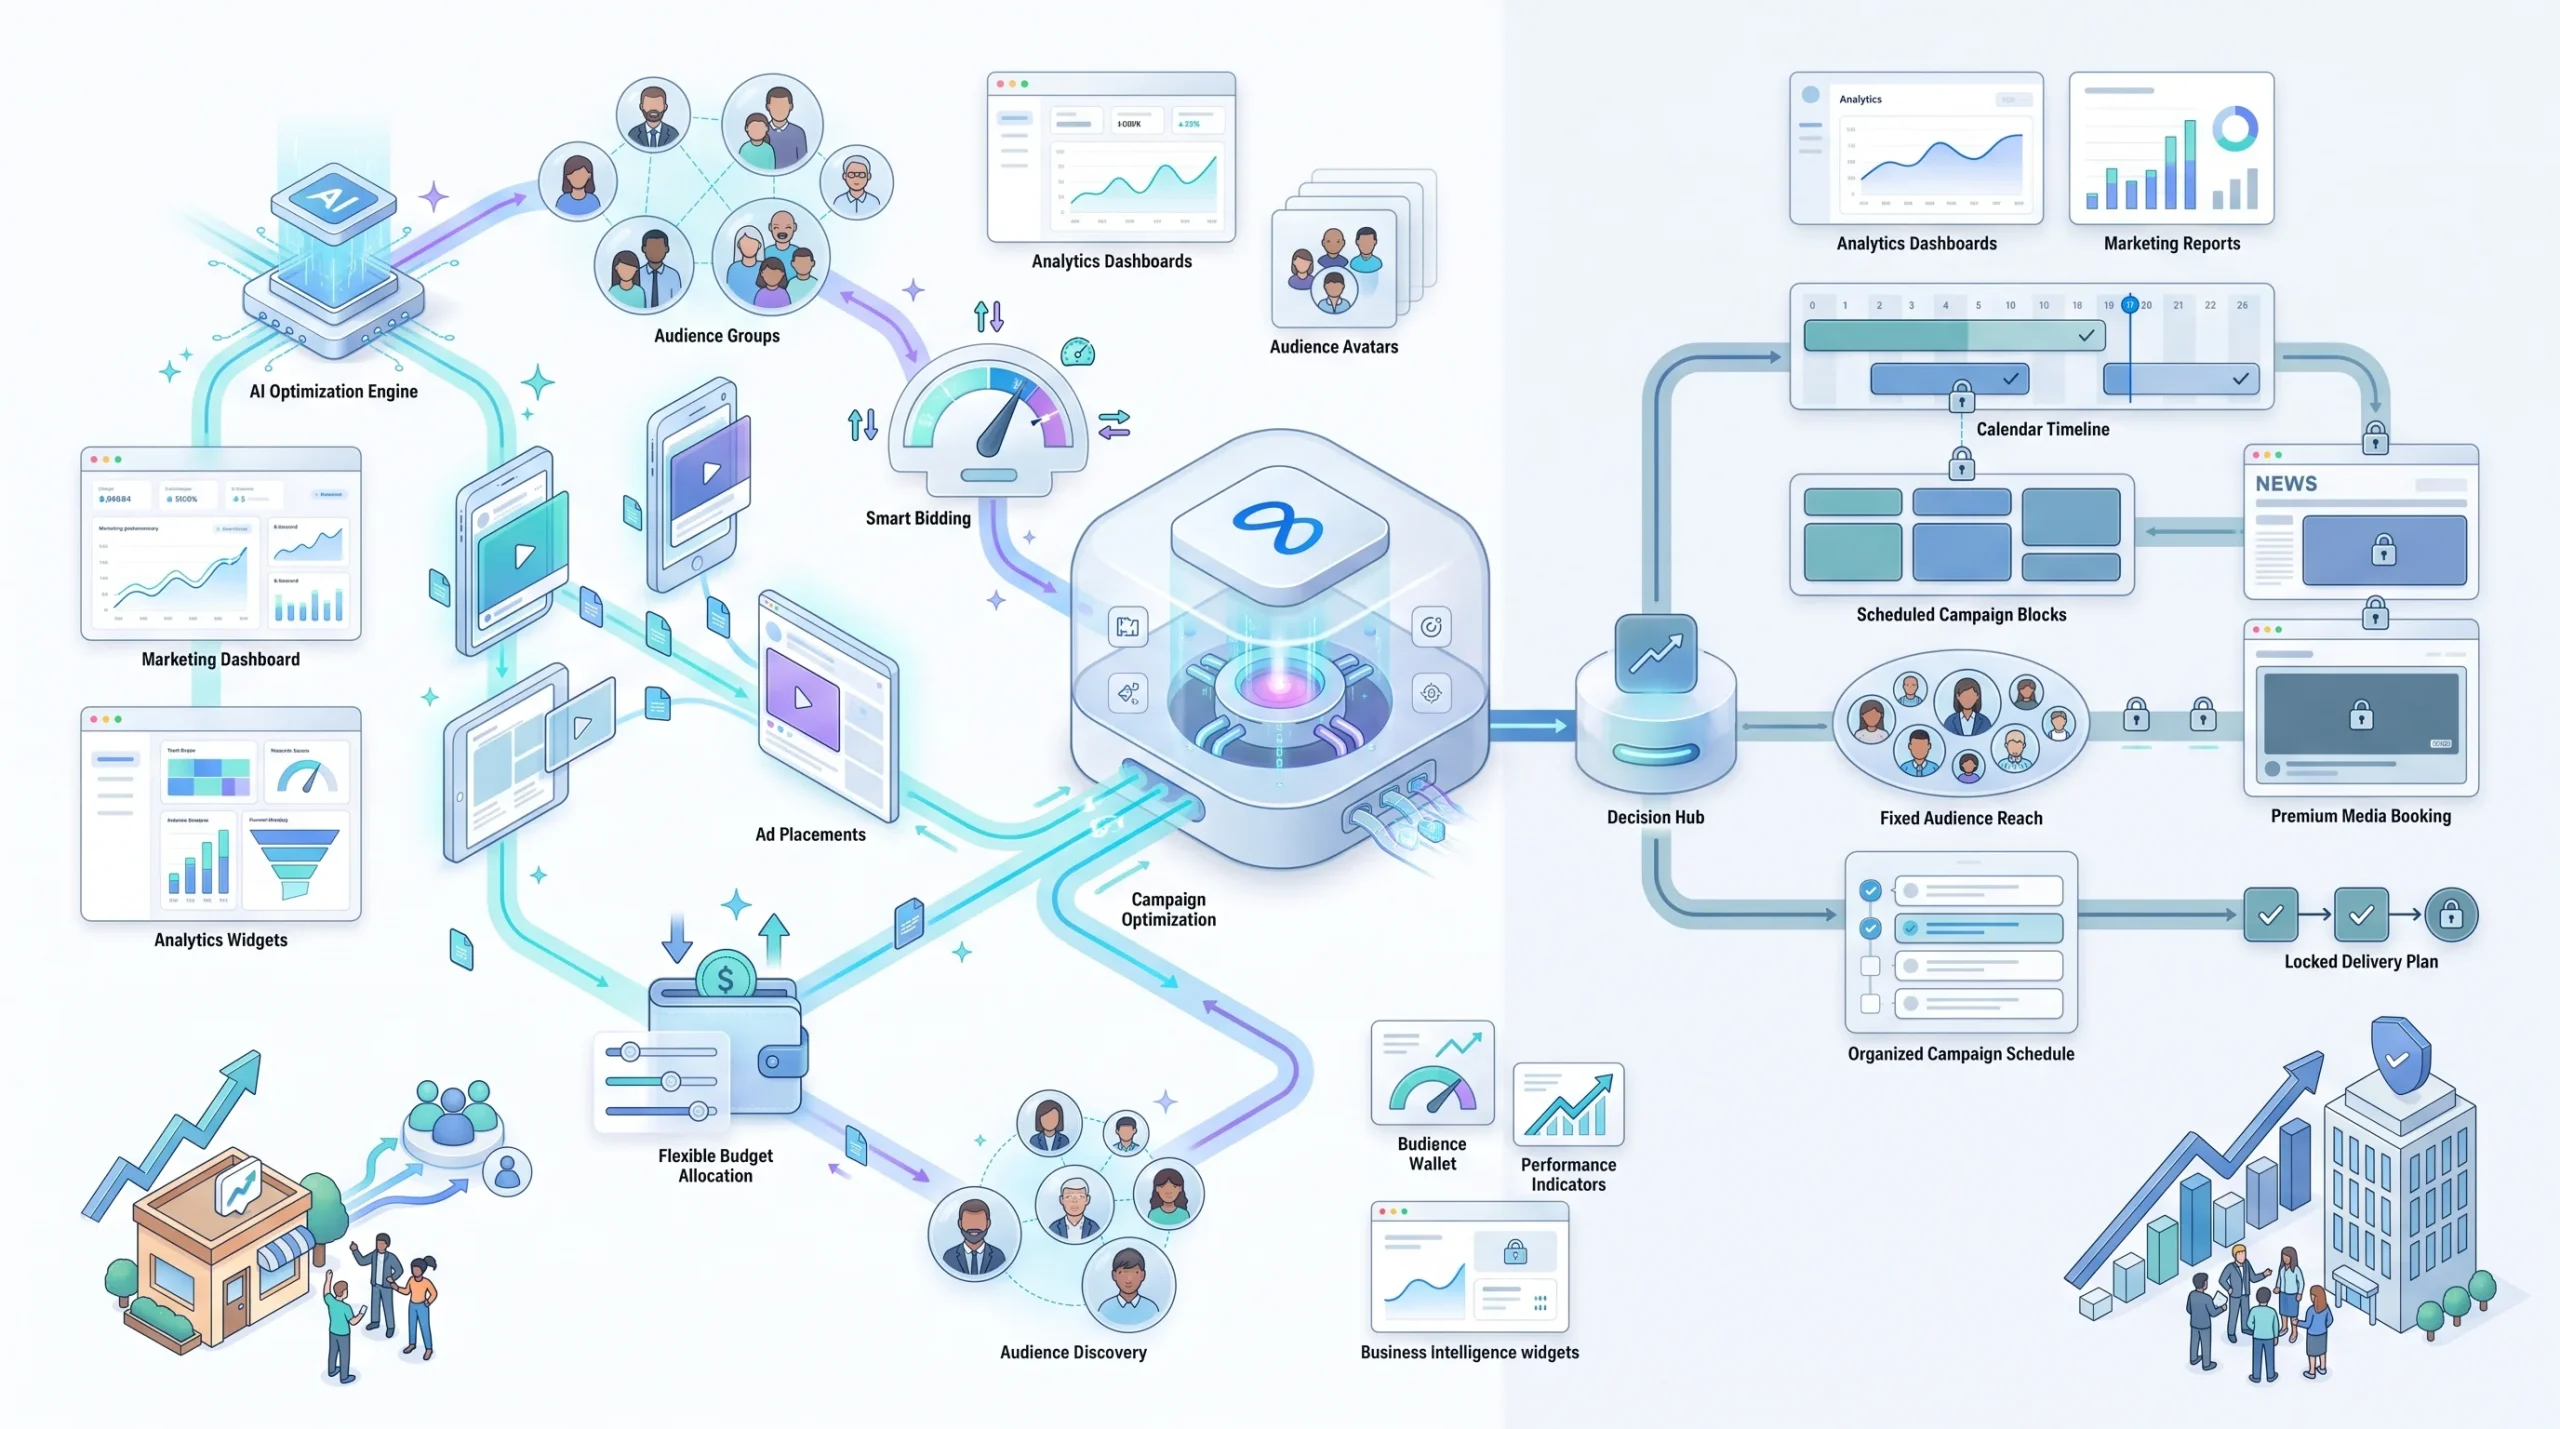
Facebook gives you two buying types. Auction and Reservation. Auction is flexible, it runs across all your available placements, and Meta’s algorithm figures out the most efficient way to deliver your ad within your budget. The tradeoff is you don’t get a guaranteed exact reach number ahead of time.
Reservation is the opposite. You lock in predictable reach and frequency ahead of time, but it’s typically used by larger brands running big awareness pushes where guaranteed numbers matter more than efficiency.
Here’s the honest takeaway: if you’re a small business or you’re just getting started, you’re using Auction. Basically every campaign you’ll build follows this path. Unless you’re specifically negotiating a guaranteed reach number for a large campaign, don’t even think twice about Reservation. Pick Auction, move on to the next section.
Defining Your Target Audience
This is where the campaign either starts working or quietly wastes your budget, so take your time here.
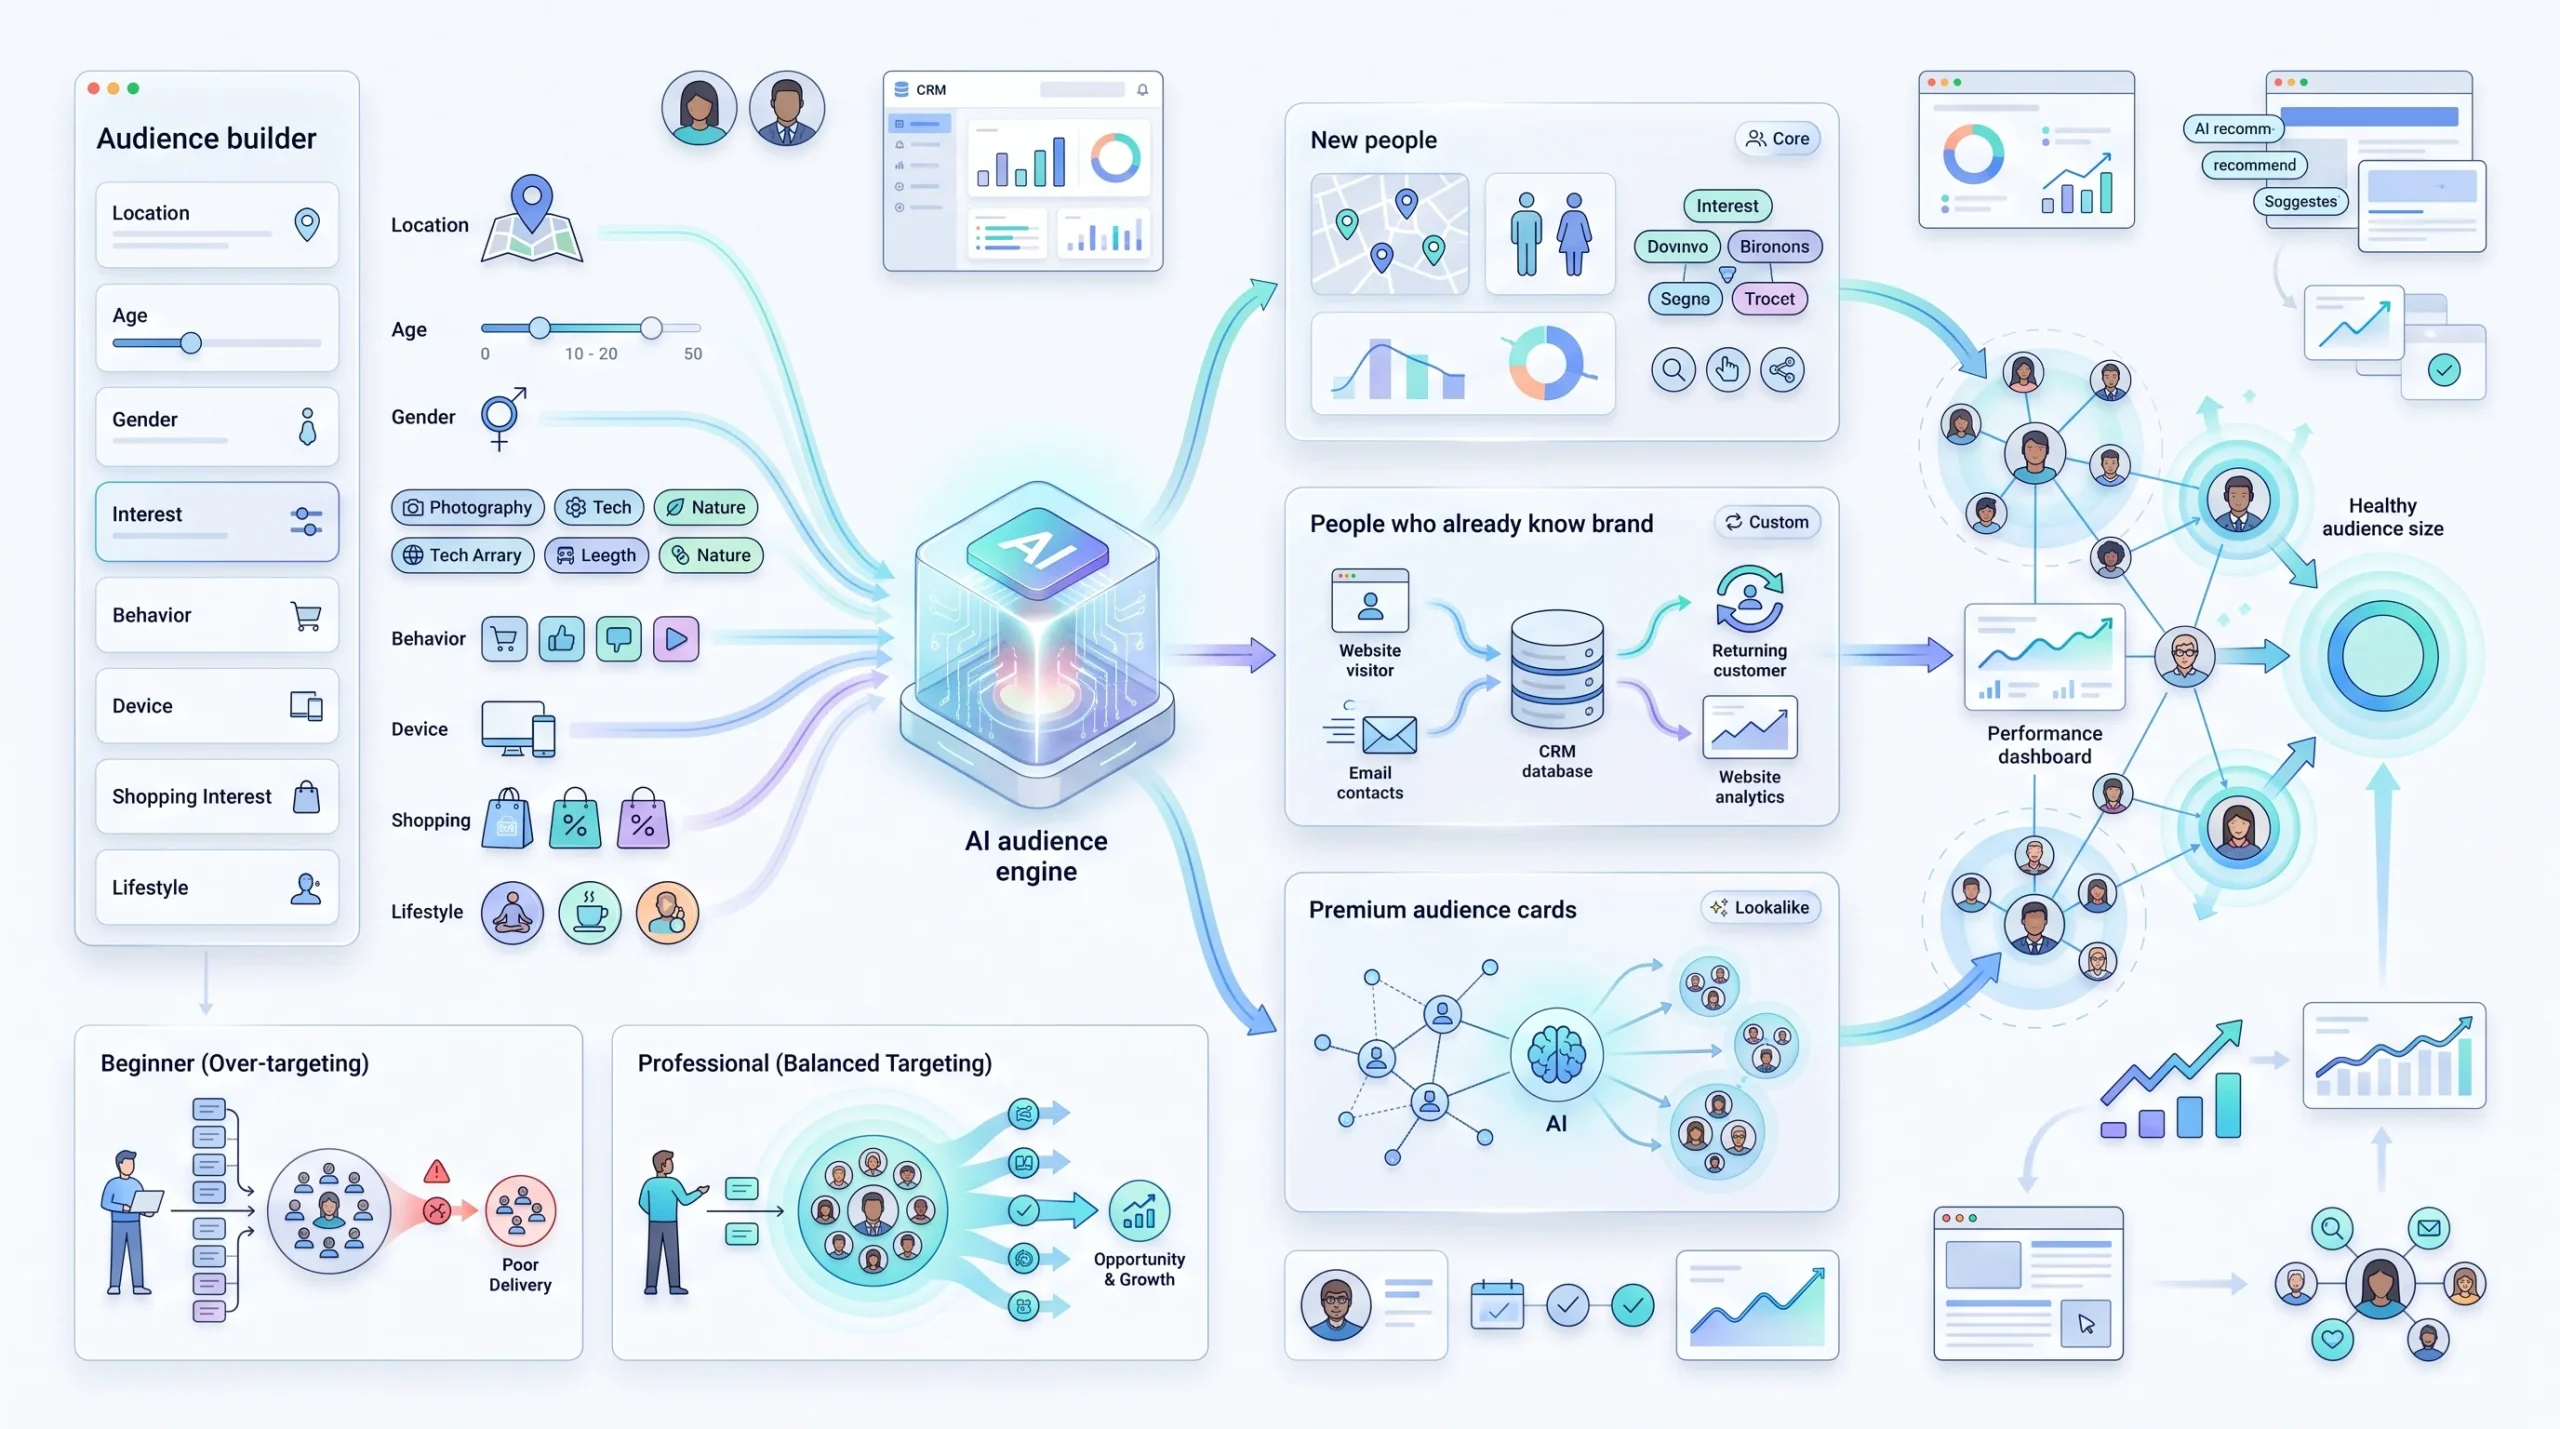
Facebook gives you three types of audiences to work with, and they’re meant to be used in a logical order, not picked at random.
Core Audiences are built from demographics, interests, and behaviors. This is where every brand new business starts, because there’s no existing customer data to work from yet. You’re telling Facebook the location, age range, gender, interests, and behaviors of the person you think wants what you’re selling.
Custom Audiences are for people who already know you. Someone who visited your website, someone on your email list, someone who’s engaged with your Page before. This requires either a pixel tracking website visitors or an uploaded list, so it’s not available on day one for a brand new account.
Lookalike Audiences take an existing audience of your best customers and find new people who share similar patterns. This is a scaling tool, not a starting point. You need a source audience of a decent size before Facebook has enough to work with.
| Audience Type | Best For | Requires Existing Data? |
|---|---|---|
| Core Audience | New businesses, cold outreach | No |
| Custom Audience | Retargeting site visitors, email lists | Yes (pixel or list) |
| Lookalike Audience | Scaling to new people similar to your best customers | Yes (source audience of 100+) |
Here’s how to actually build a Core Audience at the ad set level.
Step 1: Set your location. Start broad if you’re new. Even a whole city or region beats an overly specific zip code radius when you’re still gathering data.
Step 2: Set age and gender, only if relevant. Don’t narrow gender unless your product genuinely only applies to one gender. Narrowing “just in case” is a habit, not a strategy.
Step 3: Add interests and behaviors, sparingly. Add two or three that are genuinely relevant. Stop there. This is the step where beginners go overboard.
Step 4: Check your audience size estimate on the right-hand panel. If it’s showing as very narrow or very small, back off one of the filters you added and see it widen back up.
Step 5: Save the audience if you plan to reuse it across future ad sets, so you’re not rebuilding it from scratch every time.
Now here’s where beginners consistently shoot themselves in the foot. They think narrower targeting equals smarter targeting. So they stack five interests, three behaviors, a super specific age range, and end up with an audience so small Facebook barely has anyone left to show the ad to. Delivery gets expensive and inconsistent, and the beginner walks away thinking “Facebook ads don’t work” when really, they just built an audience the size of a small neighborhood and expected it to perform like a city.
Worth knowing too: Meta pushes Advantage+ audience expansion pretty hard these days, which is their AI-assisted way of loosening your manual targeting slightly to find people the algorithm thinks will convert, even outside your exact criteria. For beginners without a ton of historical data, leaning into that expansion rather than fighting it tends to be the smarter move early on.
The riskiest thing a beginner can do with targeting isn’t going too broad. It’s going too narrow before the data exists to justify it.
Setting Your Budget and Schedule
Numbers time. This is the section where vague advice does the most damage, so let’s actually get specific.
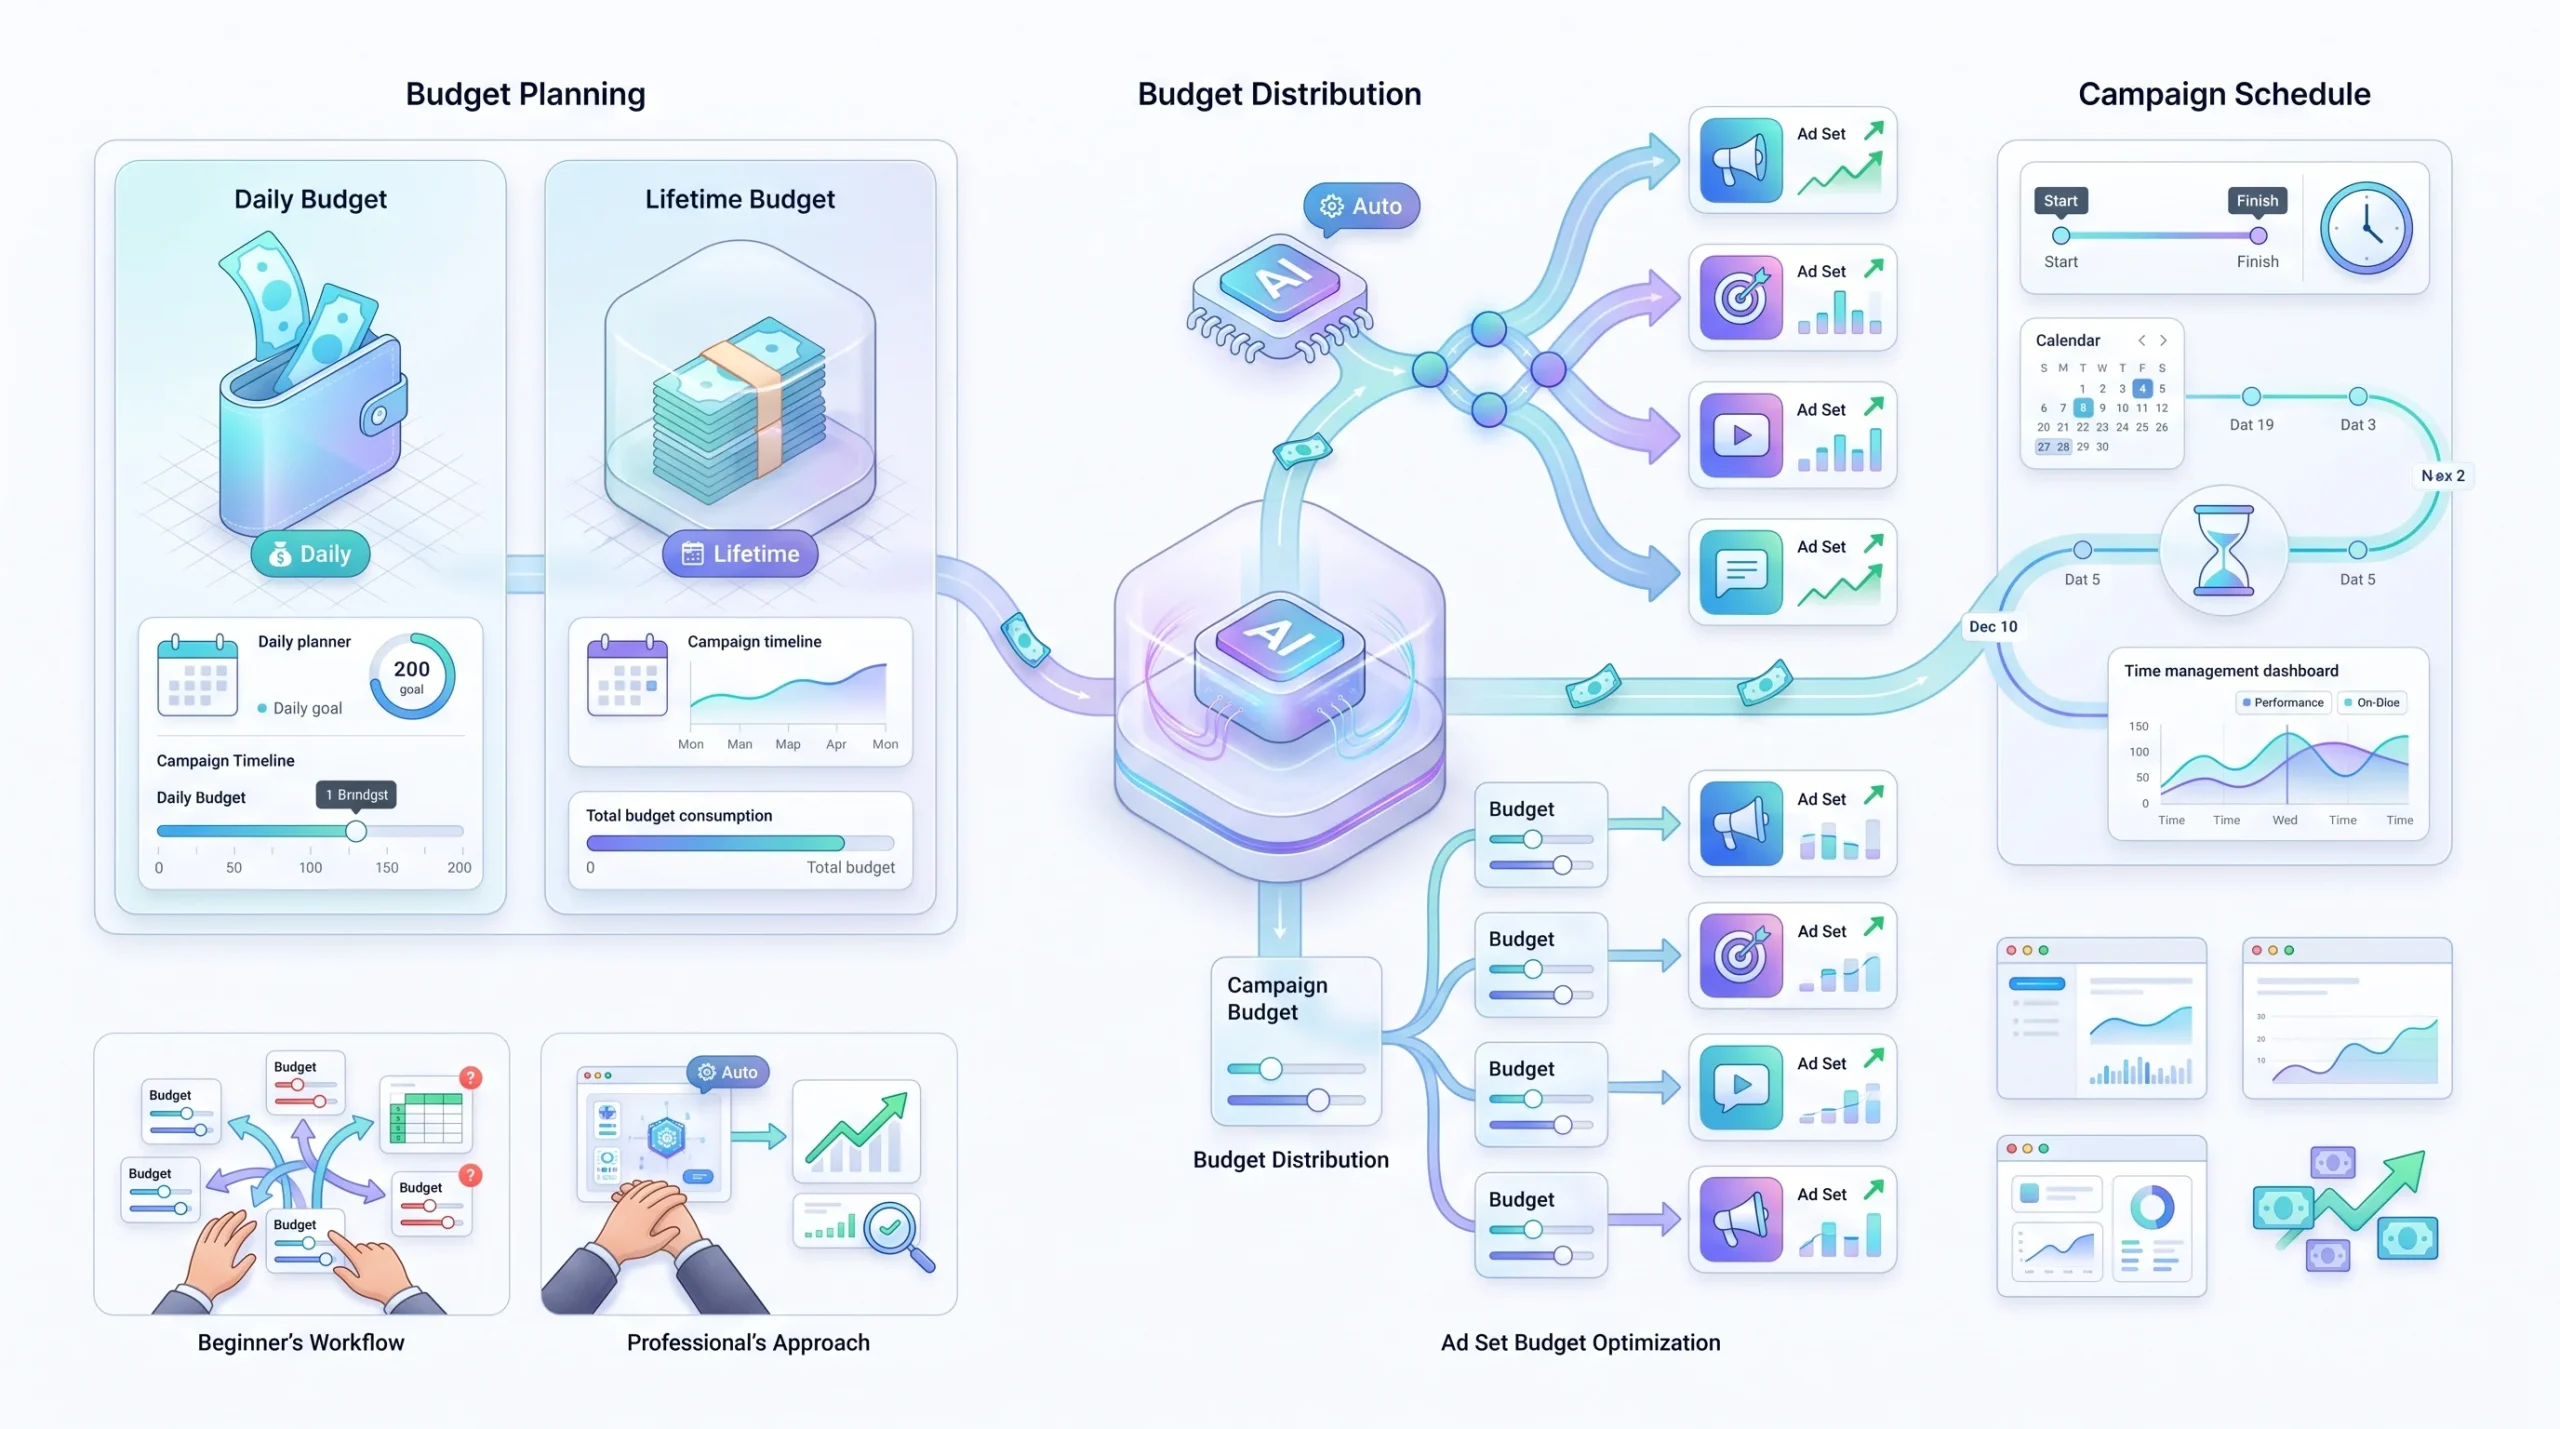
First decision: daily budget or lifetime budget. Daily budget means Facebook spends roughly that amount every single day, and it’s the right call for ongoing, always-on campaigns you plan to keep running indefinitely. Lifetime budget sets a total spend across a fixed date range, which makes more sense for time-bound promotions, like a weekend sale or a launch window with a clear end date.
Next, Campaign Budget Optimization versus Ad Set Budget Optimization, usually shortened to CBO and ABO. With CBO, you set one budget at the campaign level, and Facebook’s algorithm automatically shifts money between your different ad sets, sending more toward whichever one is performing better. With ABO, you manually set a budget for each individual ad set and control the split yourself.
For a first-time advertiser, CBO tends to be the easier starting point. You’re not sitting there manually reallocating spend between ad sets every day, the algorithm handles that shifting for you. The tradeoff is your budget can sometimes skew heavily toward one ad set if it starts performing early, even if you wanted a more even test. ABO gives you more control, but it also demands more of your attention, because nothing shifts automatically. You have to notice underperformance and adjust it yourself.
| Factor | CBO (Campaign Budget) | ABO (Ad Set Budget) |
|---|---|---|
| Who controls spend distribution | Meta’s algorithm | You, manually |
| Best for | Beginners, simpler campaigns | Testing multiple audiences with control |
| Risk | Budget can skew heavily to one ad set | Requires more manual monitoring |
| Recommended for first-time advertisers | Yes | Only once comfortable with the platform |
Here’s the actual sequence at the ad set level:
Step 1: Choose daily or lifetime budget. Pick based on whether this campaign runs indefinitely or has a fixed end date.
Step 2: Enter your budget amount. Set a figure that can realistically generate enough results in a week to tell you something. A budget so small it can’t produce any meaningful data isn’t testing anything, it’s just quietly leaking money.
Step 3: Set your schedule. If you’re using a lifetime budget, you’ll also set a start and end date here. Daily budgets can run on an ongoing schedule or within date limits too, your call.
Step 4: Leave bidding on automatic. Also labeled “lowest cost” on the screen. Manually setting bid caps is a more advanced move that assumes you already understand your cost benchmarks. Starting there before you have any baseline data is guessing blind.
Choosing Placements
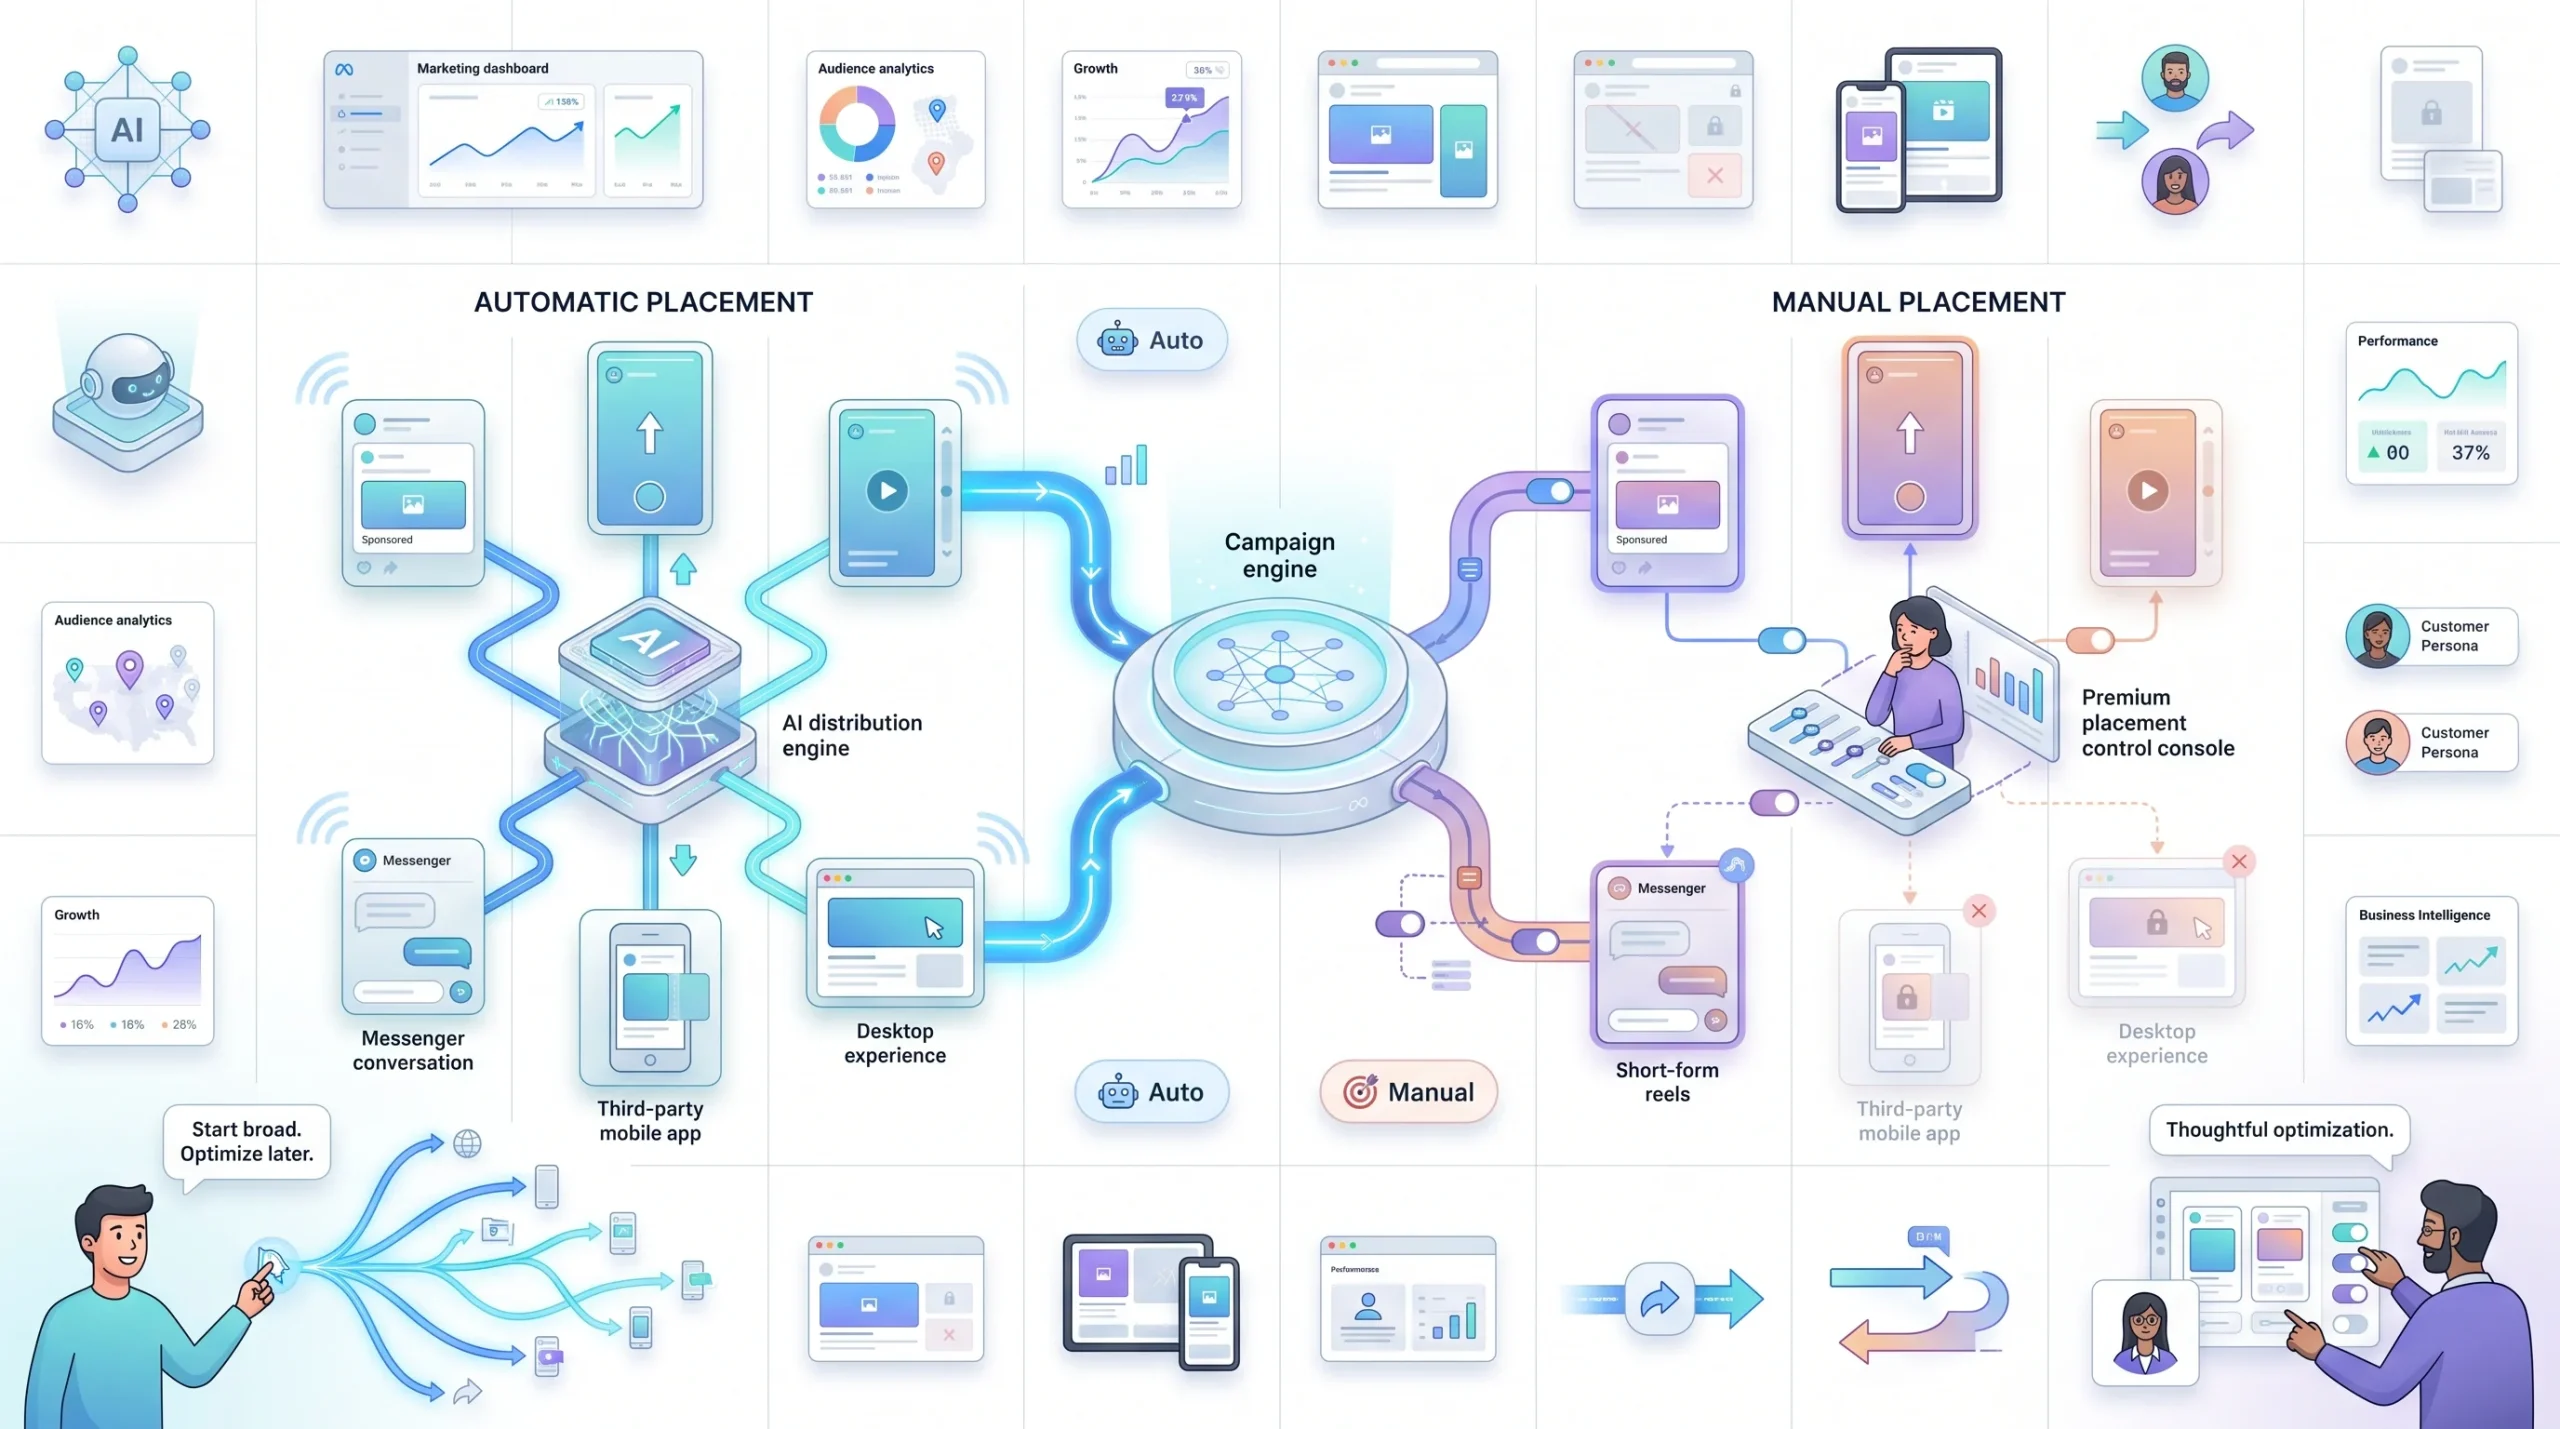
Placements decide where your ad actually shows up. Facebook feed, Instagram feed, Stories, Reels, Messenger, the Audience Network of partner apps and sites, all of it.
You get two options here. Automatic placements, sometimes labeled Advantage+ placements, let Facebook decide where to run your ad based on where it’s likely to perform best for the lowest cost. Manual placements let you handpick exactly where it shows up.
Meta itself recommends automatic placements for beginners, and honestly, that recommendation makes sense. The algorithm has access to way more inventory to optimize delivery and cost against when you don’t restrict it. Narrowing that pool before you have any performance data usually just drives your cost per result up, not down.
There are legitimate reasons to go manual, though. Maybe you want to exclude Audience Network entirely for brand safety reasons, since it places ads on third-party apps and sites outside Facebook’s own properties. Or maybe you’ve got a video built specifically for Stories and it just doesn’t translate well into a static feed placement. Those are real reasons to narrow things down, but they’re decisions you make once you understand your creative and your brand needs, not decisions you make on day one out of caution.
If you do want to go manual at some point, here’s where: at the ad set level, under Placements, select “Manual Placements” instead of the default “Advantage+ Placements,” then uncheck whichever platforms or positions you want to exclude. Everything stays checked unless you actively uncheck it.
Start with automatic placements for the first campaign or two. Narrowing placements manually before there’s performance data to justify it usually just increases cost per result, not decreases it.
Creating the Ad Itself
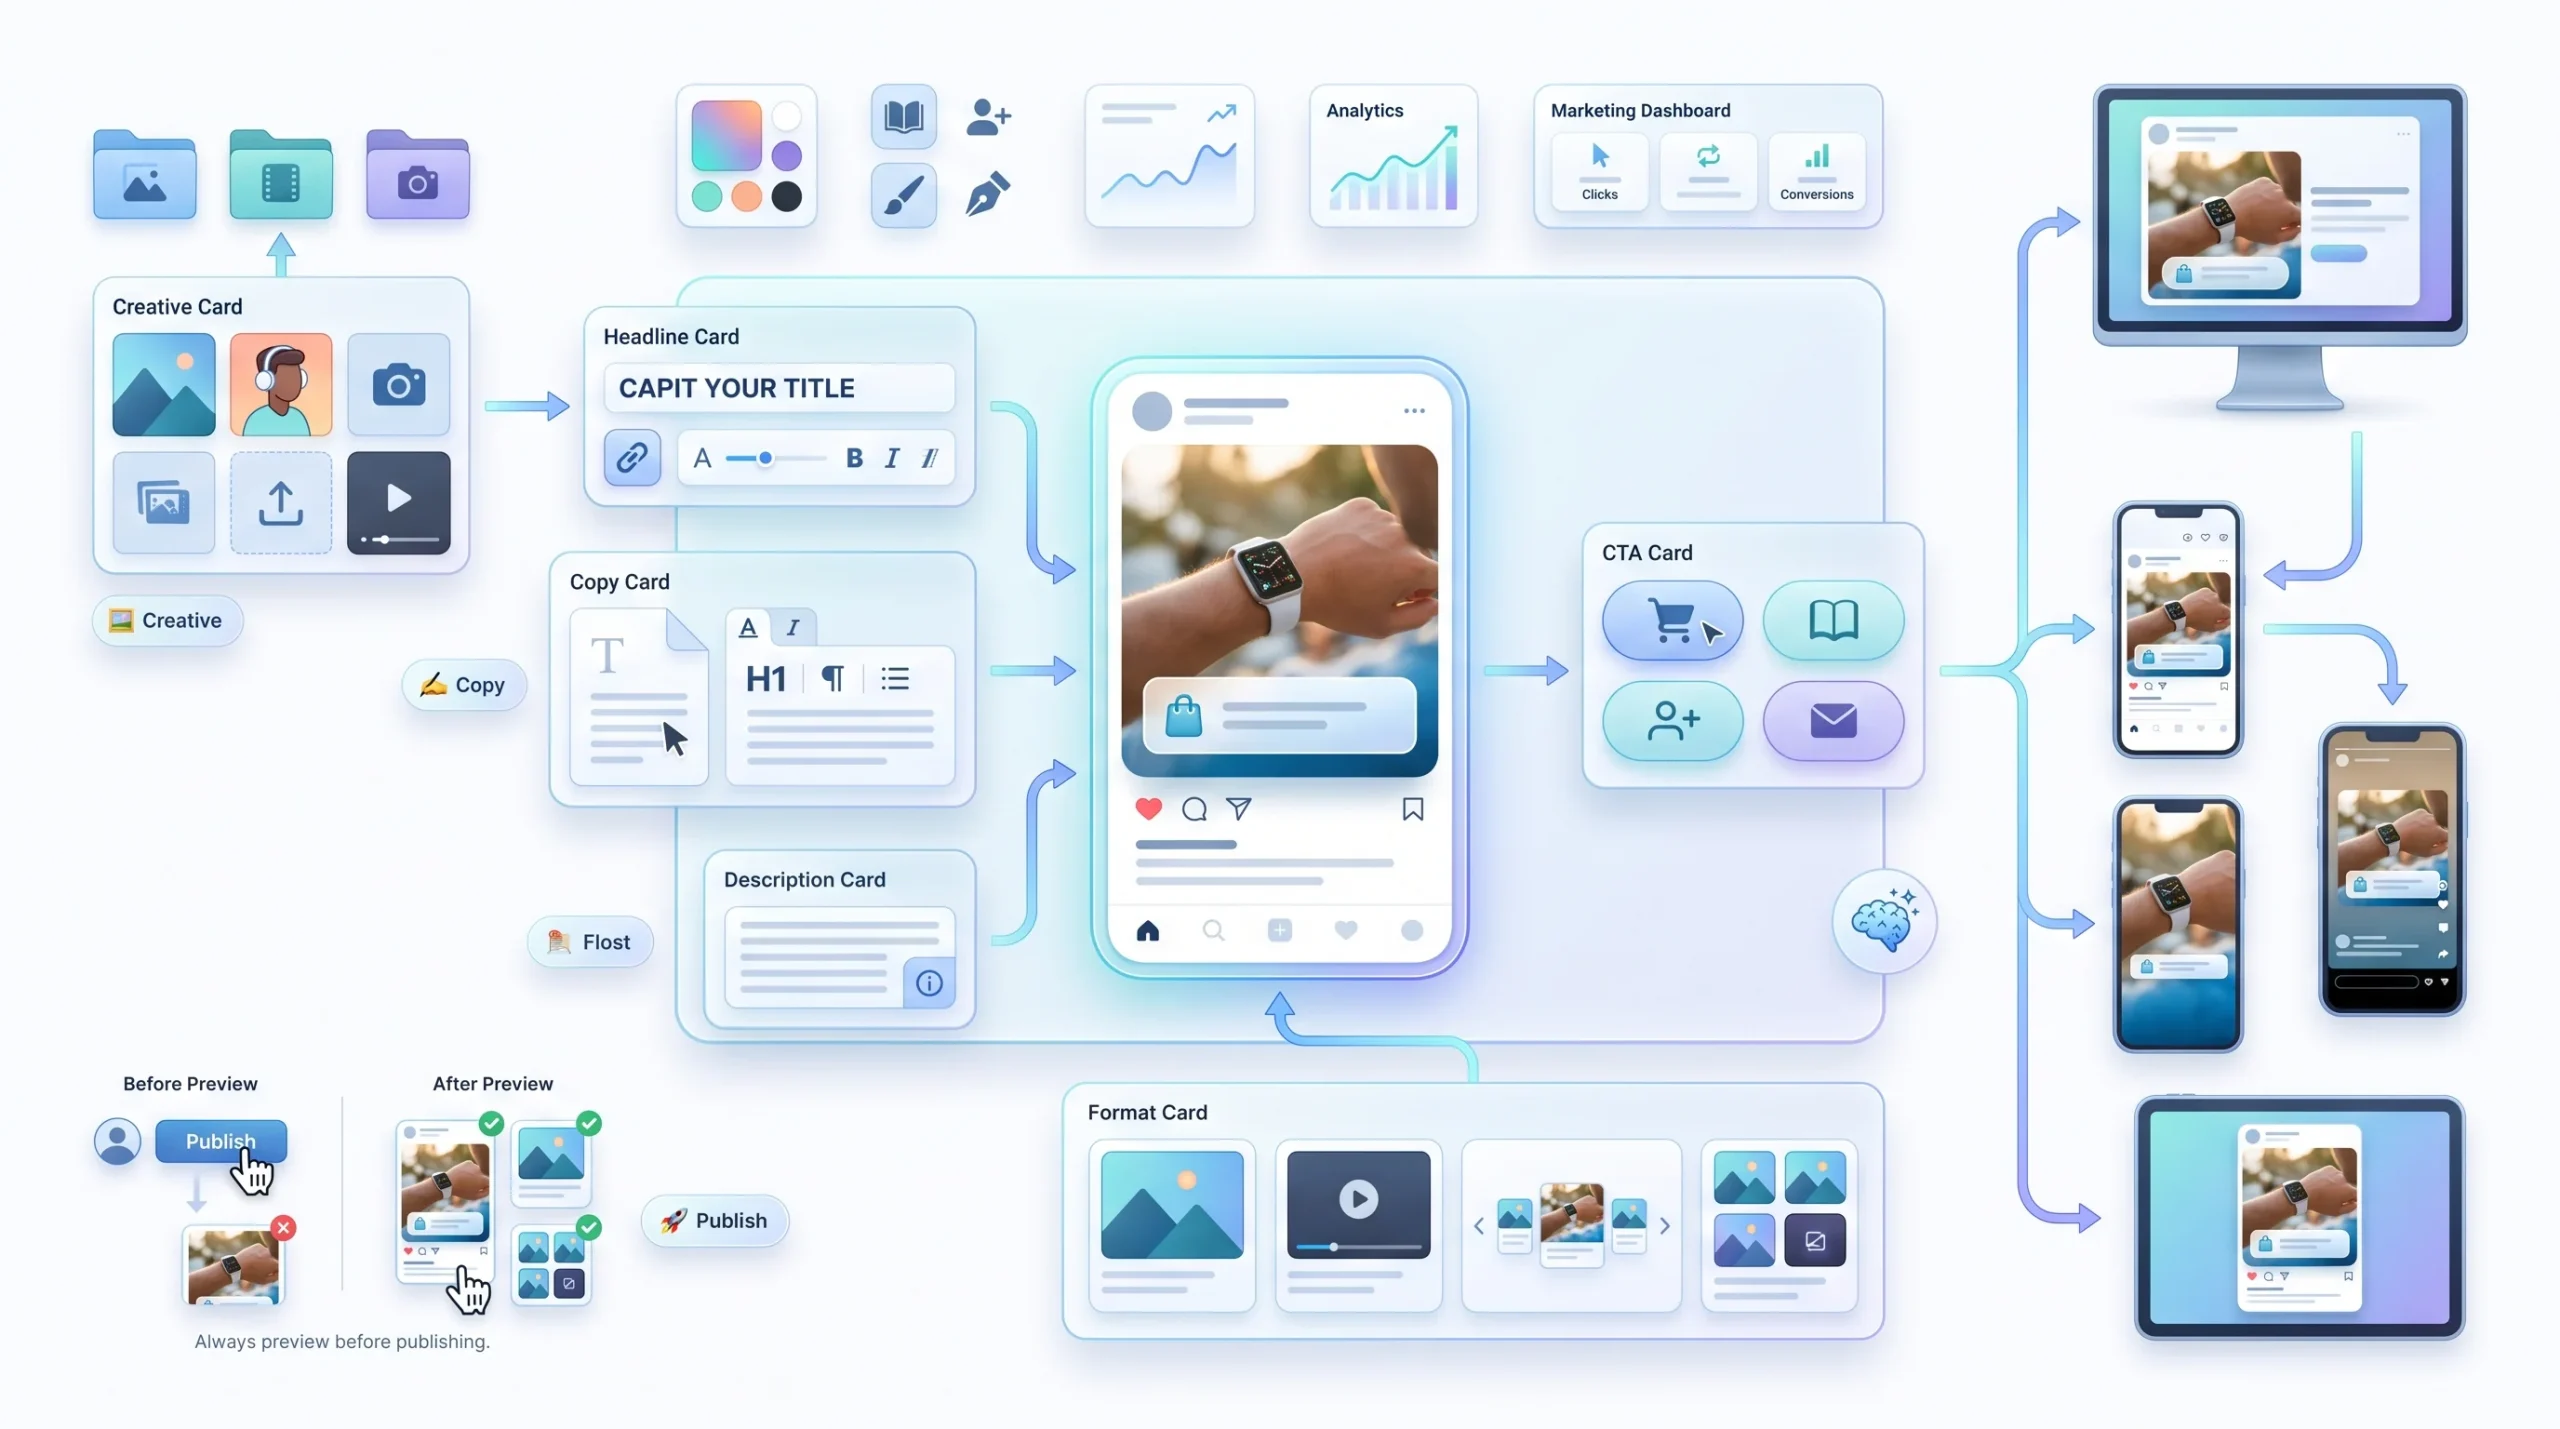
This is the biggest hands-on section, and it’s also the one that determines whether all the setup work before this actually pays off. You can nail the targeting and the budget perfectly, but if the ad itself doesn’t grab anyone, none of that matters. Here’s the build, step by step.
Step 1: Select the right Page. At the ad level, confirm the correct Facebook Page is selected, and the correct Instagram account too if you’re running there as well. Sounds obvious, but double check it, especially if you or your client manage more than one Page.
Step 2: Choose your ad format. Facebook gives you single image, single video, carousel, and collection.
Single image is the simplest option, fast to produce, and honestly a solid default for a first-time advertiser who just wants to get something live and start learning. Single video tends to drive stronger engagement, particularly for storytelling or product demos, but the first few seconds need to earn attention immediately, because people scroll fast. Carousel lets you show up to ten cards in one ad, which works well for multiple products or walking someone through a step-by-step story. Collection is built specifically for e-commerce, pulling from a product catalog, but it does require that catalog to already be set up.
| Format | Best For | Notes |
|---|---|---|
| Single Image | Simple, fast to produce, works everywhere | Good default for first-time advertisers |
| Single Video | Storytelling, demos, higher engagement | Keep first 3 seconds attention-grabbing |
| Carousel | Multiple products or a step-by-step story | Up to 10 cards |
| Collection | E-commerce catalogs | Requires a product catalog set up |
Step 3: Upload your creative. Click “Add Media” and upload your image or video. Aspect ratio matters more than most beginners realize. A single square image that looks fine in the main feed can get cropped awkwardly the second it shows up in Stories or Reels, cutting off exactly the part of the image you wanted people to see.
Step 4: Write your primary text. This is the main copy above the image or video. Facebook gives you rough character guidance here, and generally, shorter, punchier copy outperforms long paragraphs in ad placements. People are scrolling, not reading. Say the one thing that matters and stop.
Step 5: Write your headline. Short, and it should reinforce the offer or hook, not repeat the primary text word for word.
Step 6: Write a description, if the placement supports one. Optional in a lot of placements, but when it shows, use it to add the one detail you didn’t have room for above.
Step 7: Pick your call-to-action button. Shop Now for sales, Learn More for traffic, Sign Up for leads. It sounds like a small detail, but a mismatched button creates friction right at the moment someone’s deciding whether to click.
Step 8: Check the preview panel. On the right-hand side, scroll through how the ad looks across every placement it’s set to run on, feed, Stories, Reels, all of it. This is your last real chance to catch a cropped image or awkward text overlap before real budget starts spending against it.
Your targeting can be perfect and your budget can be generous, but if the first three seconds of your ad don’t earn attention, none of that matters.
Setting Up the Meta Pixel and Conversions API

This section matters more than a lot of beginners assume, so don’t skip past it just because it sounds technical.
The Meta Pixel is a small snippet of code you place on your website. In plain terms, it reports back what people actually do after clicking your ad. Did they land on the page and immediately leave? Did they add something to a cart? Did they buy? Without that data, Facebook is optimizing your ad delivery based on guesswork instead of actual outcomes.
Even for a beginner, this matters for a few reasons. Better optimization, since the algorithm learns from real conversion signals instead of just clicks. Retargeting audiences, since you can now build a Custom Audience of people who visited but didn’t buy. And accurate reporting, since you’ll actually know what’s driving results instead of assuming.
Worth knowing too, the pixel alone isn’t the full picture anymore. Browser tracking restrictions have chipped away at how much data pixels can capture on their own, which is why Meta now recommends running the Conversions API alongside it. That’s a server-side tracking method that fills in gaps the browser-based pixel misses, giving you a more complete picture of what’s actually happening after someone clicks your ad.
Here’s the setup path:
Step 1: Go to Events Manager. Find it inside Ads Manager’s main menu, or directly through Business Settings.
Step 2: Click the “+” and select “Web.” Then click “Connect.”
Step 3: Name your pixel. Something recognizable, like your business name, so it’s easy to identify later if you end up managing multiple accounts.
Step 4: Enter your website URL. Facebook will check for a partner integration, meaning platforms like Shopify or WordPress that support a guided setup instead of manual code.
Step 5: Choose your connection method. If a partner integration is available, follow the guided steps, it’s the easier route. If it isn’t, you’ll need to manually add the pixel code to your site, typically in the header section, either yourself or with a developer’s help.
Step 6: Confirm the pixel is firing. Use Meta’s Pixel Helper browser extension or the Test Events tab inside Events Manager to check that it’s actually capturing activity before you launch anything that depends on it.
If there’s no website yet, skip this section entirely for now. Awareness, Engagement, and Lead objectives don’t require it to get started, so there’s no reason to hold up your first campaign waiting on pixel setup.
Reviewing and Publishing Your Ad
Before hitting publish, run through a quick mental checklist. Right Page selected. Right audience saved. Budget confirmed at the level you actually meant to set. Creative checked in the preview panel across every placement.
Step 1: Scroll back up through campaign, ad set, and ad level. Confirm each section shows a green checkmark, not a warning icon, before you proceed.
Step 2: Click “Publish.” It’s usually the green button in the bottom right corner of the screen.
Step 3: Wait for review. The ad goes into review. This is standard, not a red flag. Most ads clear review within a few hours, though it can occasionally take up to a full day depending on volume and what’s being reviewed.
Step 4: Check your status. You’ll get a notification once it’s approved, or flagged. Check back inside Ads Manager if you don’t hear anything within a day.
Getting flagged for review isn’t the same as getting rejected. Review just means a human or an automated system is checking the ad against Meta’s advertising policies before it goes live. Rejection means something specifically violated those policies, and that’s a different situation entirely, which brings us to the next section.
Common Reasons Facebook Ads Get Rejected
This trips up a huge number of beginners, and it’s rarely explained clearly anywhere, so let’s actually walk through it.
Meta’s ad review process is largely automated, which is exactly why perfectly compliant ads sometimes get flagged incorrectly. It happens. If you genuinely believe your ad was rejected by mistake, there’s an appeal option inside Ads Manager, and it’s worth using rather than just assuming the algorithm is always right.
That said, most rejections trace back to a handful of common issues. Exaggerated or misleading claims, like promising guaranteed results, tend to get flagged fast. Restricted content categories, certain industries face stricter advertising rules on the platform, and it’s worth checking Meta’s Advertising Standards if you’re in one of those spaces. Broken or missing landing pages, if the link doesn’t work or there’s no visible privacy policy, that’s an easy rejection to avoid. Excessive text crammed onto an image creative can also trigger a flag, since Facebook prefers the image itself to carry the message rather than a wall of overlaid text. And calling out personal attributes directly, phrasing that implies you know something personal about the specific person viewing the ad, tends to get flagged too.
| Reason for Rejection | Quick Fix |
|---|---|
| Exaggerated or misleading claims | Rewrite copy to remove guarantees/superlatives |
| Restricted content category | Check Meta’s Advertising Standards before resubmitting |
| Broken or missing landing page | Confirm the URL works and has a visible privacy policy |
| Excessive text on image | Reduce text overlay, let the image carry the message |
| Personal attributes called out directly | Avoid “you” language implying you know something personal about the viewer |
If you do get rejected, here’s the actual fix process: open the notification or go to Account Quality inside Business Settings, read the specific policy it flagged, edit only the part that violated it, and resubmit. Don’t rebuild the whole ad from scratch. Nine times out of ten it’s one line of copy or one image detail, not the entire concept.
What Happens After You Hit Publish (Learning Phase Explained)
Here’s the part almost nobody tells beginners clearly, and it’s probably the single biggest reason first campaigns “don’t work.”
When a new ad set goes live, it enters what Facebook calls the Learning Phase. During this window, the algorithm is still figuring out who to show your ad to and how to deliver it efficiently. It needs a certain volume of results before it exits learning and delivery actually stabilizes. You can actually see this labeled directly inside Ads Manager, in the delivery column next to your ad set, it’ll say “Learning” until that phase wraps up.
Here’s the part that gets beginners into trouble. Every time you edit an ad set that’s still in the learning phase, even a small change like adjusting the budget slightly or tweaking the audience, it resets that learning process. The algorithm starts over from scratch. So someone launches a campaign, checks it obsessively three hours later, panics because the numbers look rough, edits something to “fix” it, and unknowingly resets the whole learning process. Then they check again a few hours later, still rough, panic again, edit again. That cycle is exactly why a campaign can run for days and never seem to improve. It’s not that the campaign is broken. It’s that it never got the chance to leave the learning phase in the first place.
A more realistic approach is giving a new ad set at least three to four days before making any changes, even if the early numbers look rough. That’s genuinely hard to do when it’s your own money on the line, but it’s the difference between a campaign that actually gets a fair shot and one that gets sabotaged by impatience.
Know what’s normal to see early on. Higher cost per result and inconsistent delivery in the first few days is expected, not alarming. What’s actually worth stopping for is different, things like zero delivery at all, an ad that’s been disapproved, or budget getting spent with literally no results whatsoever. Those are real red flags. A slightly high cost per click on day two is not.
The Learning Phase punishes impatience. Every time you edit a struggling ad set to “fix” it, you send it back to square one.
KPIs to Track as a Beginner
Rather than dumping a giant list of metrics on you all at once, it’s more useful to think about this by funnel stage. Different numbers matter at different points in someone’s journey from “never heard of you” to “just bought something.”
At the top of the funnel, where you’re building awareness, CPM, cost per one thousand impressions, tells you how expensive it is just to get seen. This number swings wildly depending on industry and competition, so there’s no universal benchmark to chase here.
In the middle of the funnel, where someone’s considering whether to click, two numbers matter. Click-through rate, or CTR, tells you whether your creative and copy are actually earning clicks, and a rough starting benchmark worth aiming for is somewhere around 1 percent or higher, though this varies by industry. Cost per click, or CPC, tells you how efficiently you’re driving that traffic, and again, this one varies heavily depending on your space.
At the bottom of the funnel, where the actual outcome happens, cost per result or CPA tells you what it costs to get the specific outcome you’re after, whether that’s a lead, a sign-up, or a purchase. This number depends entirely on your own product economics, so treat it as something to calculate against your own margins, not something to compare against someone else’s business. Return on ad spend, or ROAS, tells you the revenue generated per dollar spent, and a range commonly cited as healthy for e-commerce sits somewhere around 2x to 4x, though this is a reference point, not a universal target.
| Funnel Stage | Primary KPI | What It Tells You | Rough Beginner Benchmark |
|---|---|---|---|
| Awareness (TOFU) | CPM (Cost per 1,000 impressions) | How expensive it is to get seen | Varies heavily by industry |
| Consideration (MOFU) | CTR (Click-through rate) | Whether your creative/copy earns clicks | Around 1%+ is a healthy starting point |
| Consideration (MOFU) | CPC (Cost per click) | Cost efficiency of driving traffic | Varies heavily by industry |
| Conversion (BOFU) | CPA / Cost per Result | Cost to get the actual outcome you want | Depends entirely on product/offer economics |
| Conversion (BOFU) | ROAS (Return on ad spend) | Revenue generated per dollar spent | 2x to 4x commonly cited as a healthy range for e-commerce |
These benchmarks vary enormously depending on your industry, your offer, and your average order value, so treat them as reference points rather than universal targets. The real benchmark that actually matters is your own break-even math, not a number pulled from someone else’s business.
Here’s where to actually find these numbers: inside Ads Manager, at any level, campaign, ad set, or ad, the columns above your results table are customizable. Click “Columns,” then “Customize Columns,” and add CPM, CTR, CPC, Cost per Result, and ROAS if you’re tracking purchases. Save that as your default view so you’re not hunting for it every time you log in.
The real job in the first few weeks isn’t hitting some target ROAS on day one. It’s learning to read these numbers together instead of in isolation. A low CPC paired with a high CPA, for example, usually means the ad is attracting plenty of clicks, just from the wrong people.
Conclusion
Most people don’t fail at Facebook ads because their strategy was wrong. They fail because they quit before the algorithm ever had enough data to actually work, or because they kept touching a campaign that just needed to be left alone for a few days. That’s really the whole game here. Set the structure up right, pick an objective that matches what you actually want, give it a real budget and a real audience, and then let it run long enough to tell you something. If you’ve been reading this far without opening Ads Manager, that’s the next move. Stop researching and go build the first campaign using this as your reference. Once you’ve got the funnel basics down, it’s worth digging into how each stage of that funnel connects, since your ad objective should always trace back to where someone actually sits in that journey.
Frequently Asked Questions
How much does it cost to run Facebook ads?
There’s no fixed price. Cost depends on your industry, audience competition, and objective, and it can range from a few cents to several dollars per result. What matters more than the number itself is your break-even math: know what a customer is worth to you before you decide what’s “expensive.”
Do I need a Meta Pixel to run Facebook ads?
Not always. If you’re running Awareness, Engagement, or Lead campaigns, you can start without one. But if your goal is website purchases, you’ll want the pixel and Conversions API running together so Meta can actually optimize toward sales instead of guessing.
How long does Facebook ad review take?
Most ads clear review within a few hours, though it can occasionally stretch to a full day. If review is taking noticeably longer than that, check Events Manager or your notifications for a rejection or an information request before assuming something’s broken.
What’s the difference between Facebook Ads Manager and Meta Business Suite?
Meta Business Suite is the broader hub for managing your Page, inbox, and posts, while Ads Manager is the dedicated tool for building and tracking campaigns. You can usually jump into Ads Manager directly from Business Suite once your Page is set up.
Can I run Facebook ads without a website?
Yes. Lead objective campaigns can collect information directly on Facebook through a native form, and Engagement or Awareness campaigns don’t require a destination URL at all. A website just opens up more objectives, like driving traffic or tracking purchases.
Why was my Facebook ad rejected?
The most common culprits are exaggerated claims, restricted content categories, broken landing pages, or too much text crammed onto an image. Review usually flags the specific policy, so check that message first, fix the exact issue, and resubmit rather than rebuilding the whole ad.
How do I know if my Facebook ad is working?
Don’t judge it in the first 24 to 48 hours, that’s normal noise. Give a new ad set at least three to four days to exit the learning phase, then look at cost per result and ROAS together rather than any single metric in isolation.
What’s the minimum budget to start with Facebook ads?
There’s no universal minimum, but going too low means Meta doesn’t get enough data to optimize delivery. A safer starting point is whatever budget lets you collect a decent volume of results within a week, and that number will shift depending on your objective and average order value.